Guide
Sep 29, 2023
Clerk Webhooks: Getting Started
Dev Agrawal
Learn how to get started with Webhooks to build integrations in a Nextjs application with Clerk's fully-featured authentication.
In an age of software that is composed of decoupled services built by specialized (often outsourced) teams, webhooks play an important architectural role. Webhooks enable us to outsource important user interactions and services to external platforms that are specifically designed for those purposes, and still have our applications be able to respond to those interactions.
For example, Clerk is specifically designed to handle authentication and user management related interactions on behalf of your applications. Webhooks allow Clerk to notify your application of these interactions so that you can implement custom follow-up logic. These interactions include (but are not limited to) signing in, changing profile information, creating an organization, or getting invited to an organization. Clerk ensures that all these important interactions are handled securely and responsively, while giving you a way to implement follow-up logic.
In this blog post we will build a simple webhook integration in a Next.js project. We will also explore the use cases of webhooks with Clerk and discuss how to best handle webhooks for production-ready applications.
This post assumes basic familiarity with Next.js and Clerk.
Setting up Webhooks in Next.js
For this walkthrough we will start with a Next.js project that is already setup with Clerk. However, you can create a webhook subscription in any server-side web framework like Express or Fastify.
If you don’t already have a Next.js project setup with Clerk, you can start by cloning the Clerk Next.js App Router template.
1git clone https://github.com/clerkinc/clerk-next-app.git
This will create a minimal Next.js project fully setup with Clerk’s embedded components and a secured dashboard page.
Create a .env.local file in the root of the project and add your keys here from the Clerk dashboard.
.env.local1
Let’s create an API route that will handle the Clerk webhook. This handler will live in app/api/clerk/route.ts and will have the URL of your-app.com/api/clerk.
Webhooks are POST requests by default, so let’s create a handler for receiving POST requests.
app/api/clerk/route.ts1export async function POST(request: Request) {}
The webhook event data is available as the request payload. Let’s parse it out and log it to the console.
app/api/clerk/route.ts1import { WebhookEvent } from "@clerk/nextjs/server";23export async function POST(request: Request) {4const payload: WebhookEvent = await request.json();5console.log(payload);6}
Clerk provides a WebhookEvent type for strong typescript inference. For now we will simply assert the webhook payload to be of this type.
Let’s also create a simple GET handler to test if we can access this URL.
app/api/clerk/route.ts1import { WebhookEvent } from "@clerk/nextjs/server";23export async function POST(request: Request) {4const payload: WebhookEvent = await request.json();5console.log(payload);6}78export async function GET() {9return Response.json({ message: "Hello World!" });10}
Add this endpoint as a public route to the Clerk middleware
middleware.ts1import { authMiddleware } from "@clerk/nextjs";23export default authMiddleware({4publicRoutes: ["/", "/api/clerk"],5});67export const config = {8matcher: ["/((?!.*\\..*|_next).*)", "/"],9};
Start the development server.
1npm run dev
Now we can navigate to this endpoint in the browser.

That’s all we need to setup a simple webhook endpoint! Now we can provide Clerk with a URL to this endpoint, and we can start receiving events.
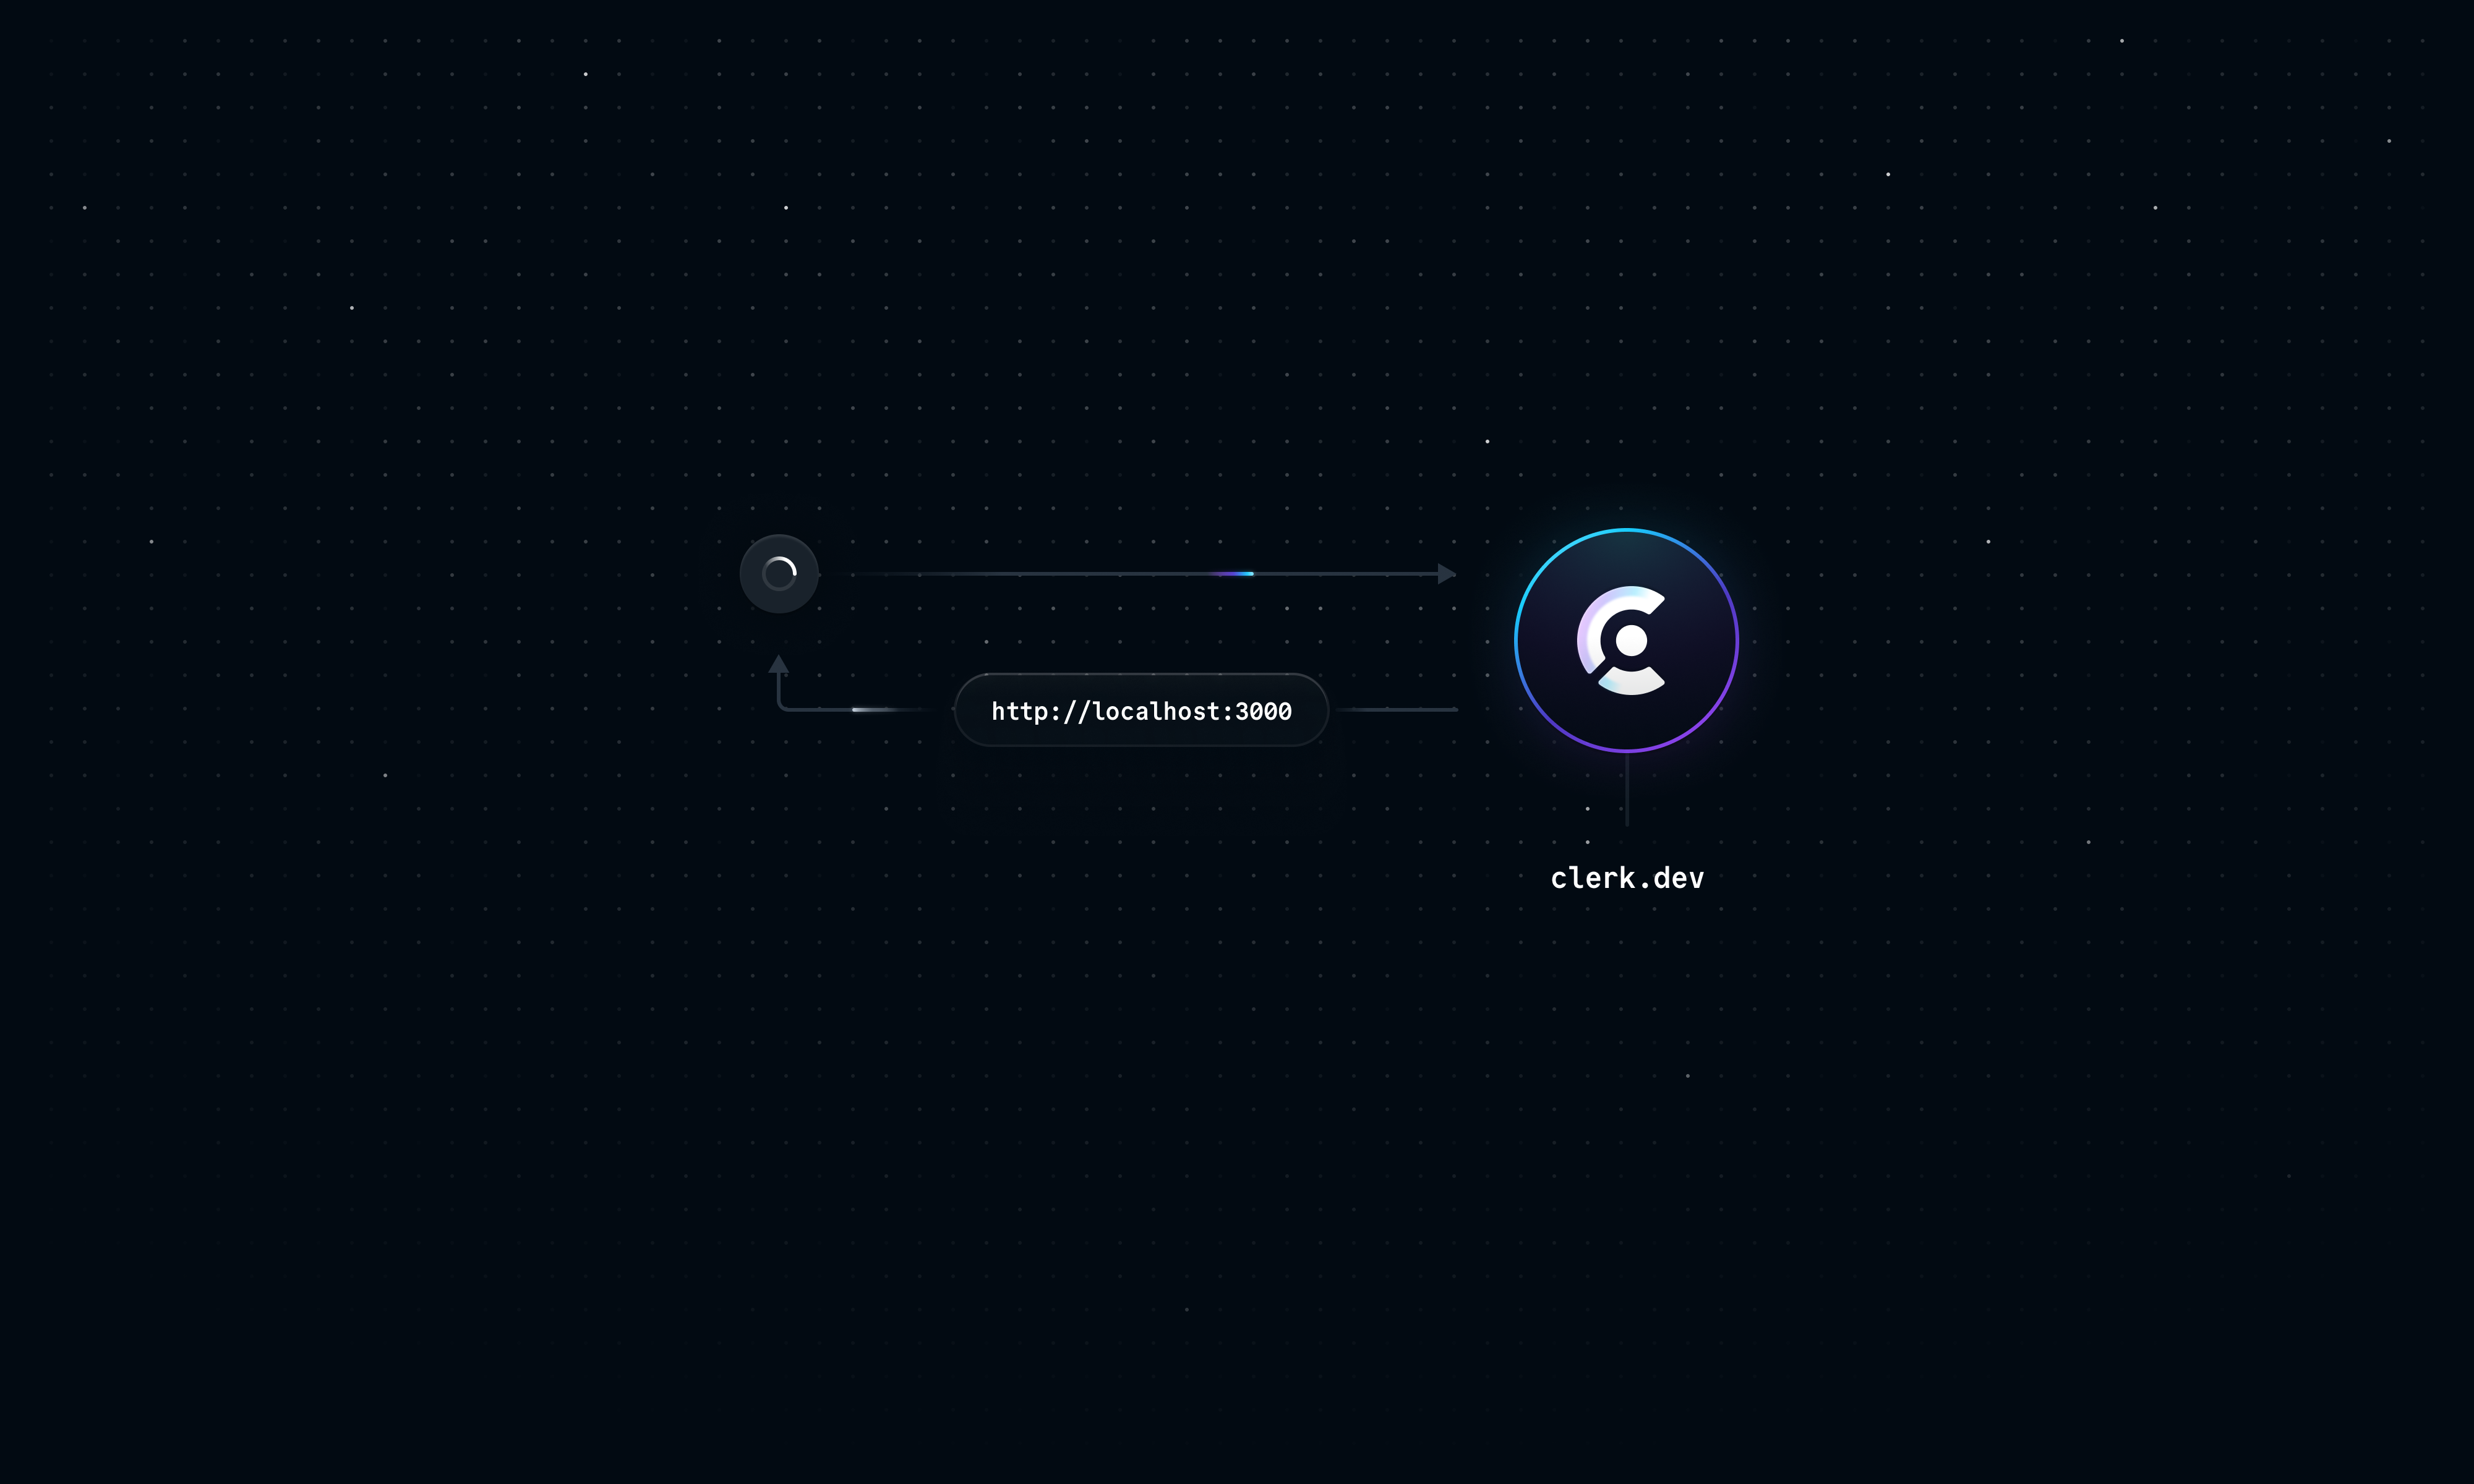
However, we are not ready to test this locally yet. While the application is accessible on localhost in our machine, it’s not accessible to anything outside our local network. Since webhook requests are originated from Clerk’s servers, the localhost URL will just point back to the Clerk server instead of our machine.
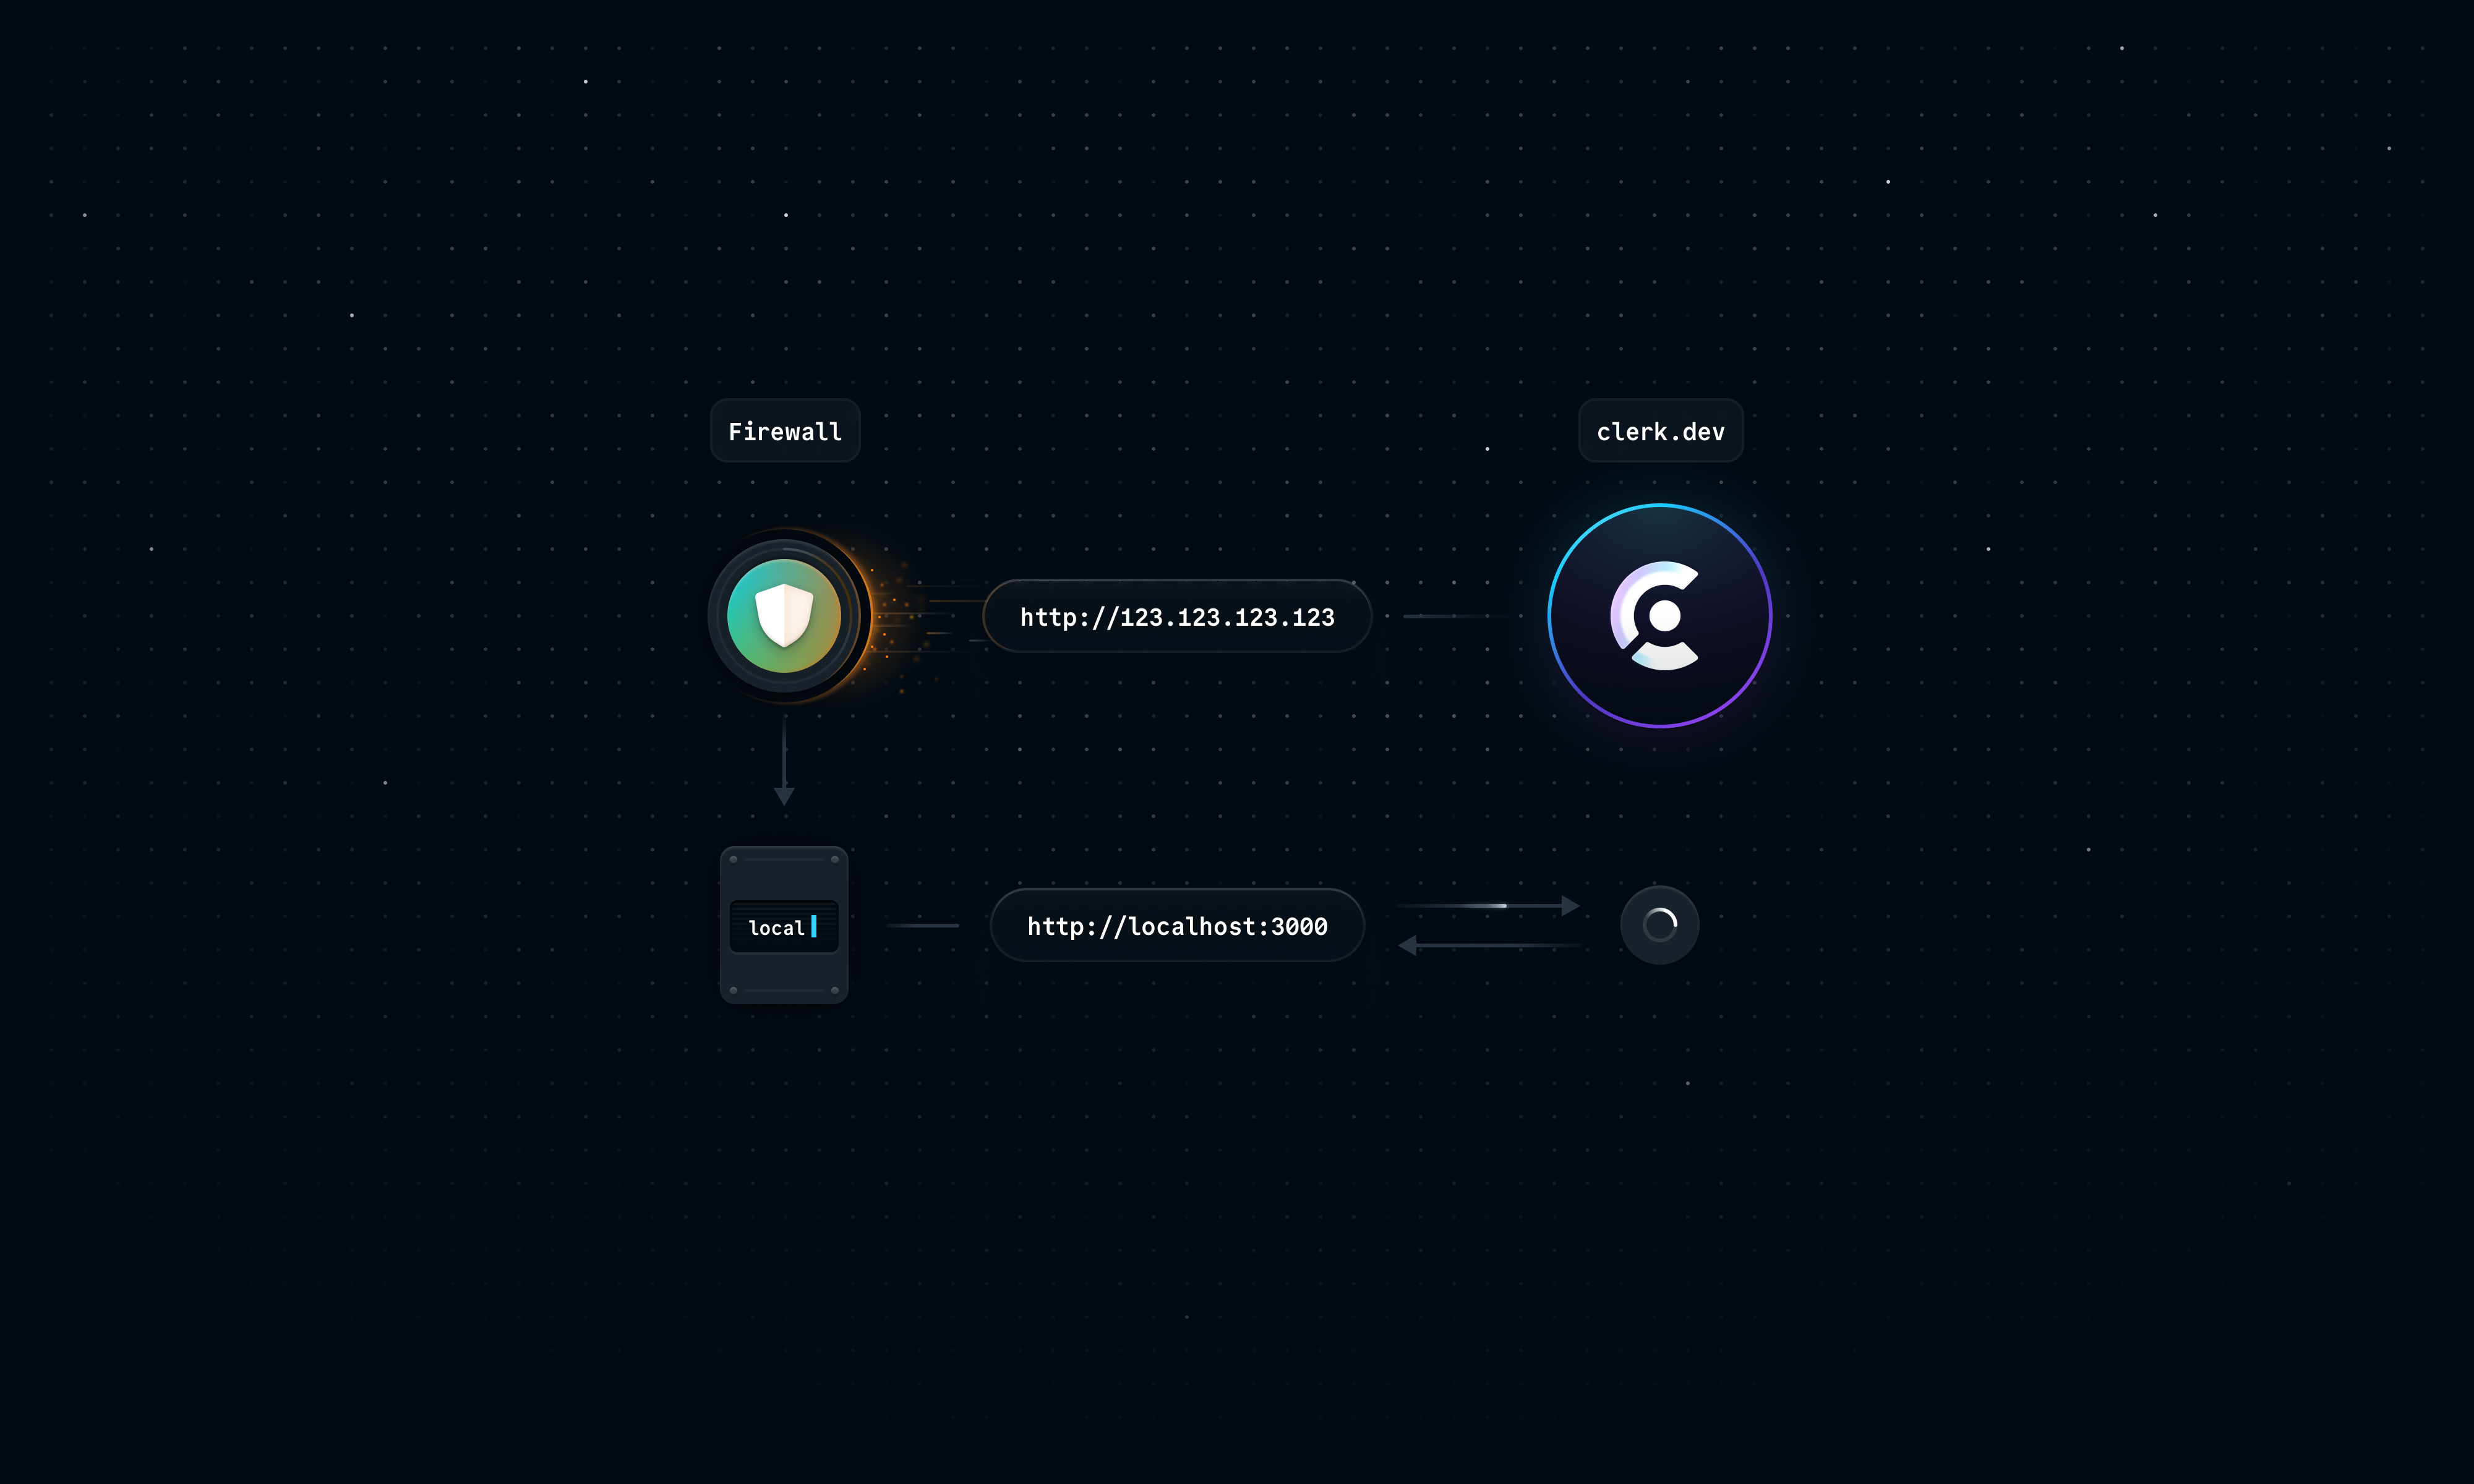
While we could provide Clerk with the public IP address of our machine, any incoming requests to our local home/work networks will be blocked by firewalls.
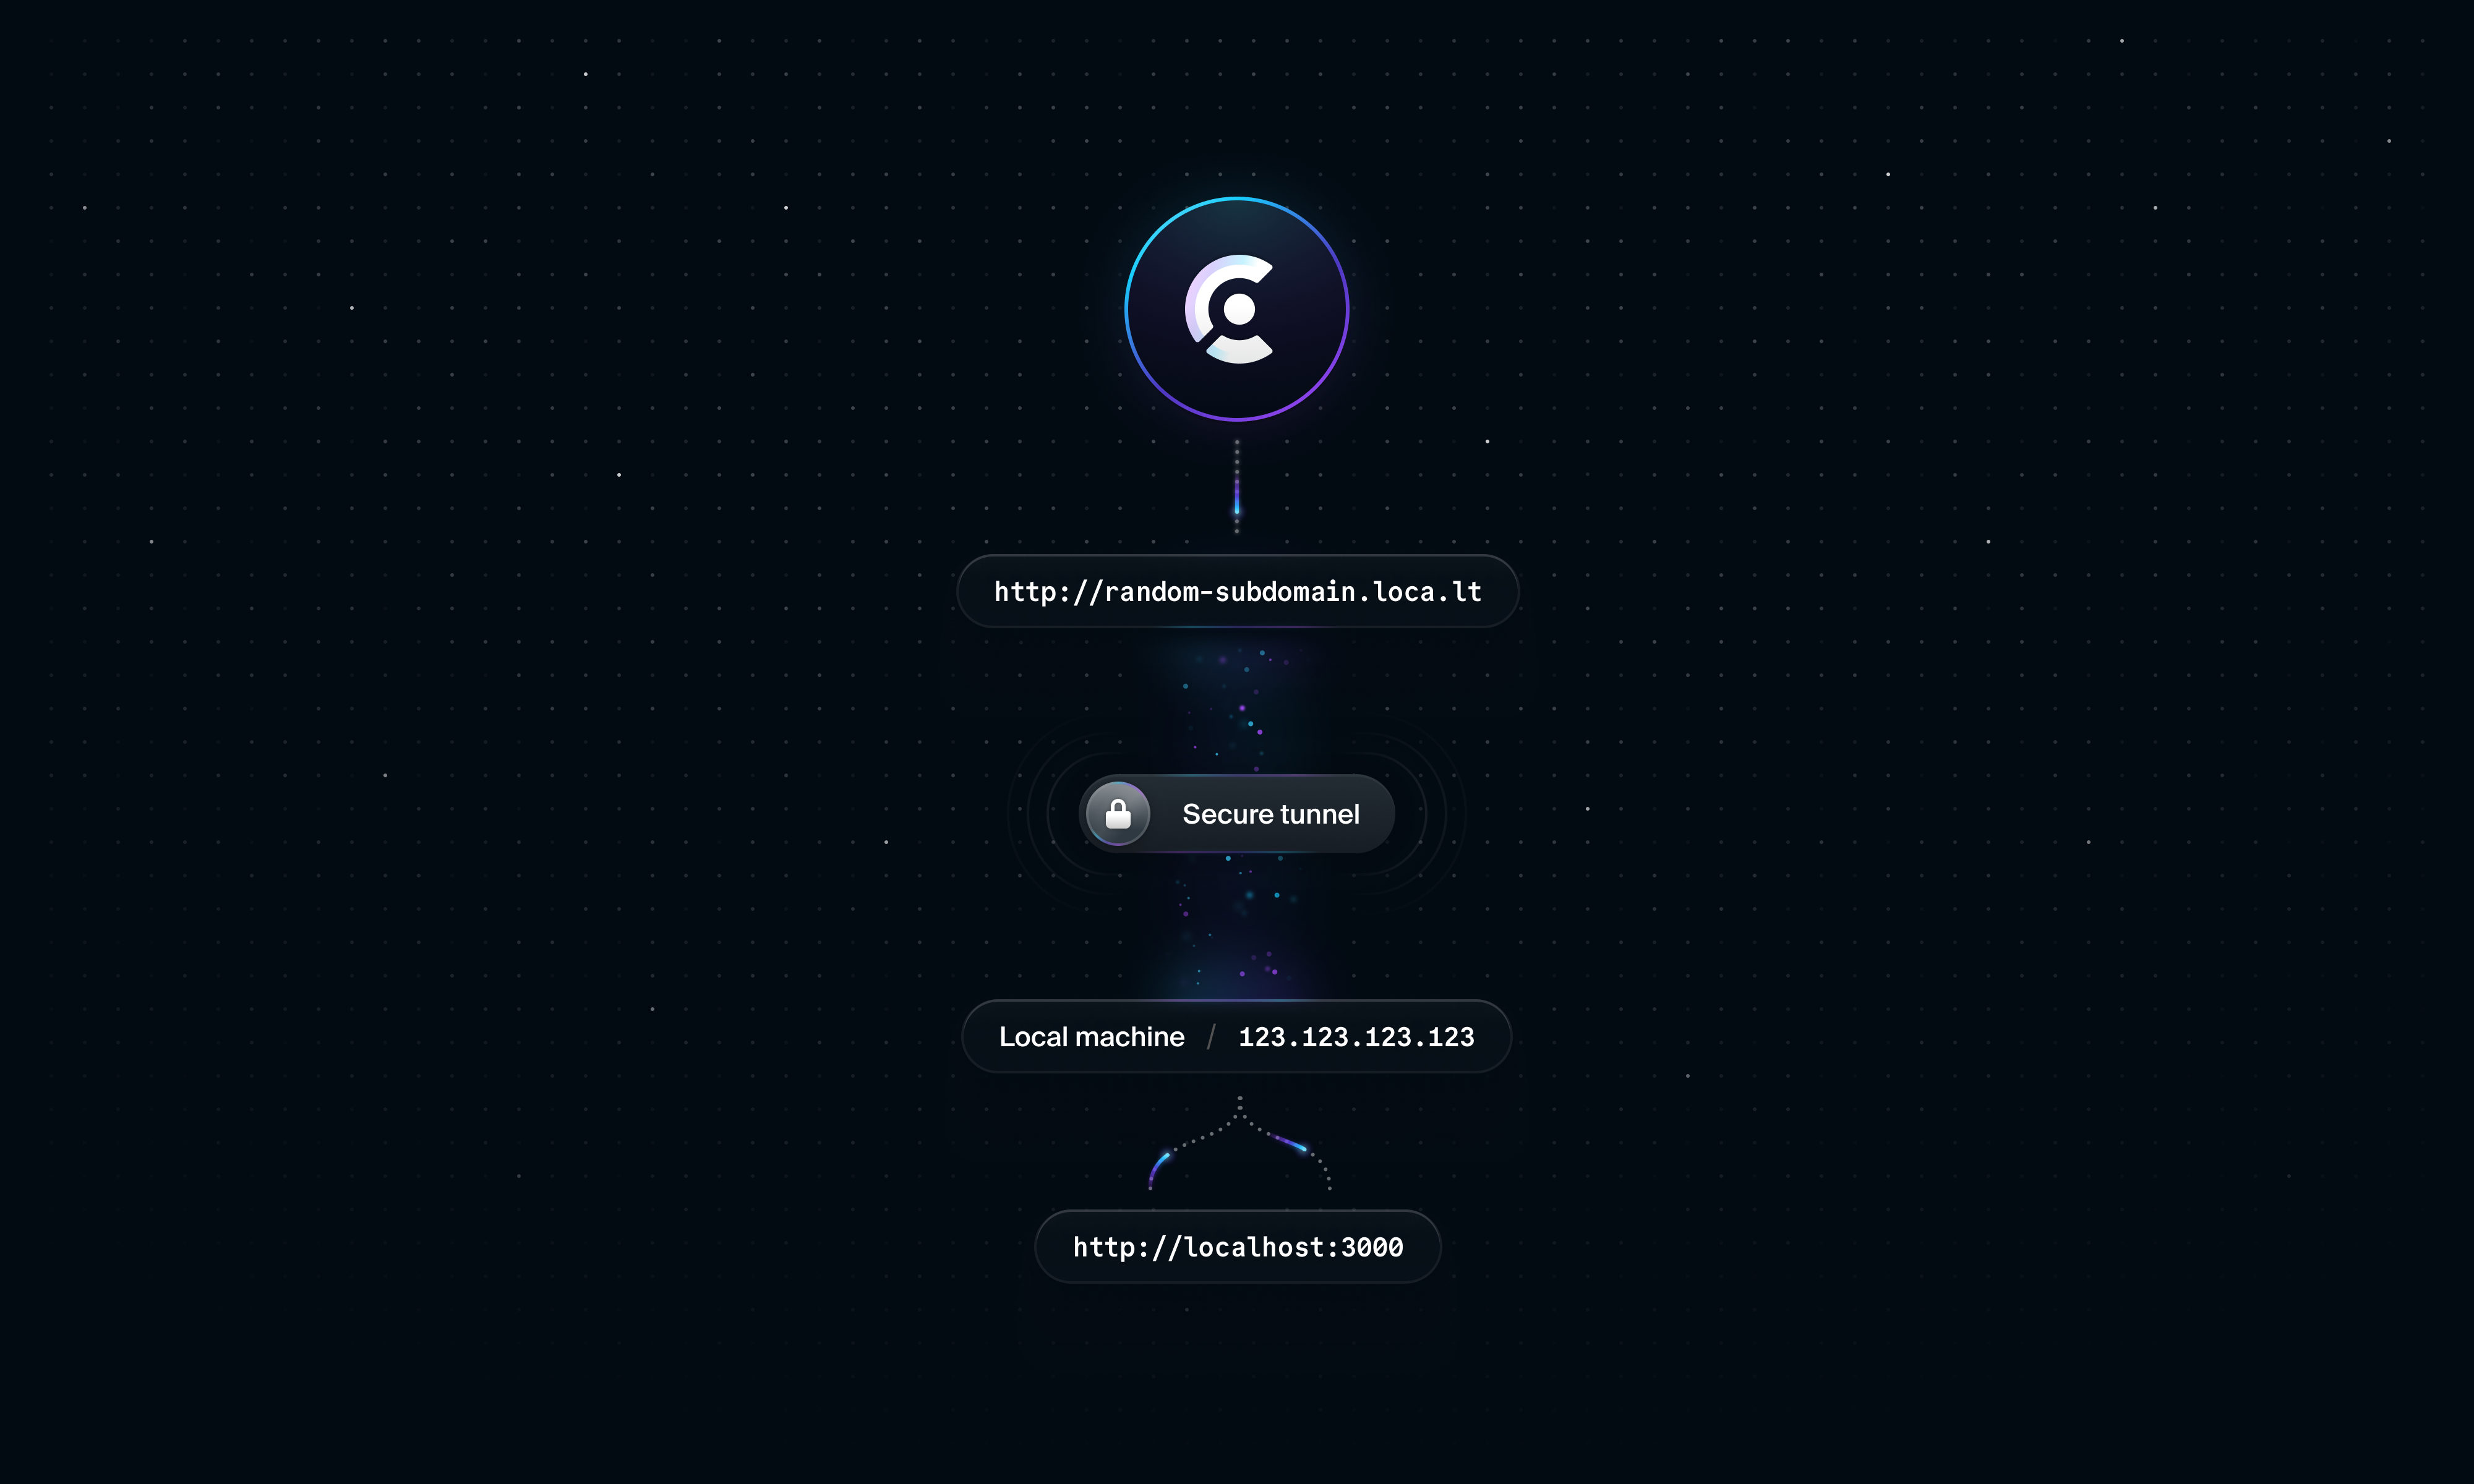
To work around this problem, we can use a tunneling service like localtunnel
Let’s setup localtunnel in a new terminal window.
1npm install -g localtunnel
Once the installation is complete, we can create a tunnel to our local server.
1lt --port 3000
You should see an output in your terminal like this.

Localtunnel will generate a random URL on the loca.lt domain that will point to your locally running server on port 3000. We can navigate to this new URL in our browser.
Localtunnel has a security mechanism built in to prevent abuse from malicious actors and phishing links. It asks for the public IP address of your local machine to ensure that it’s really you trying to access your application. Follow the instructions on this page to get your public IP address, and submit it on this page.
Once that’s done, we can access our application on this URL. We should also be able to access our webhook endpoint.
If the application doesn’t show up, make sure both the nextjs server and localtunnel are running on separate terminal windows.
Now we are ready to plug our endpoint into Clerk’s dashboard. Go to the Webhooks page, and click Add Endpoint. Enter the localtunnel URL here. You can also add a description for this endpoint.
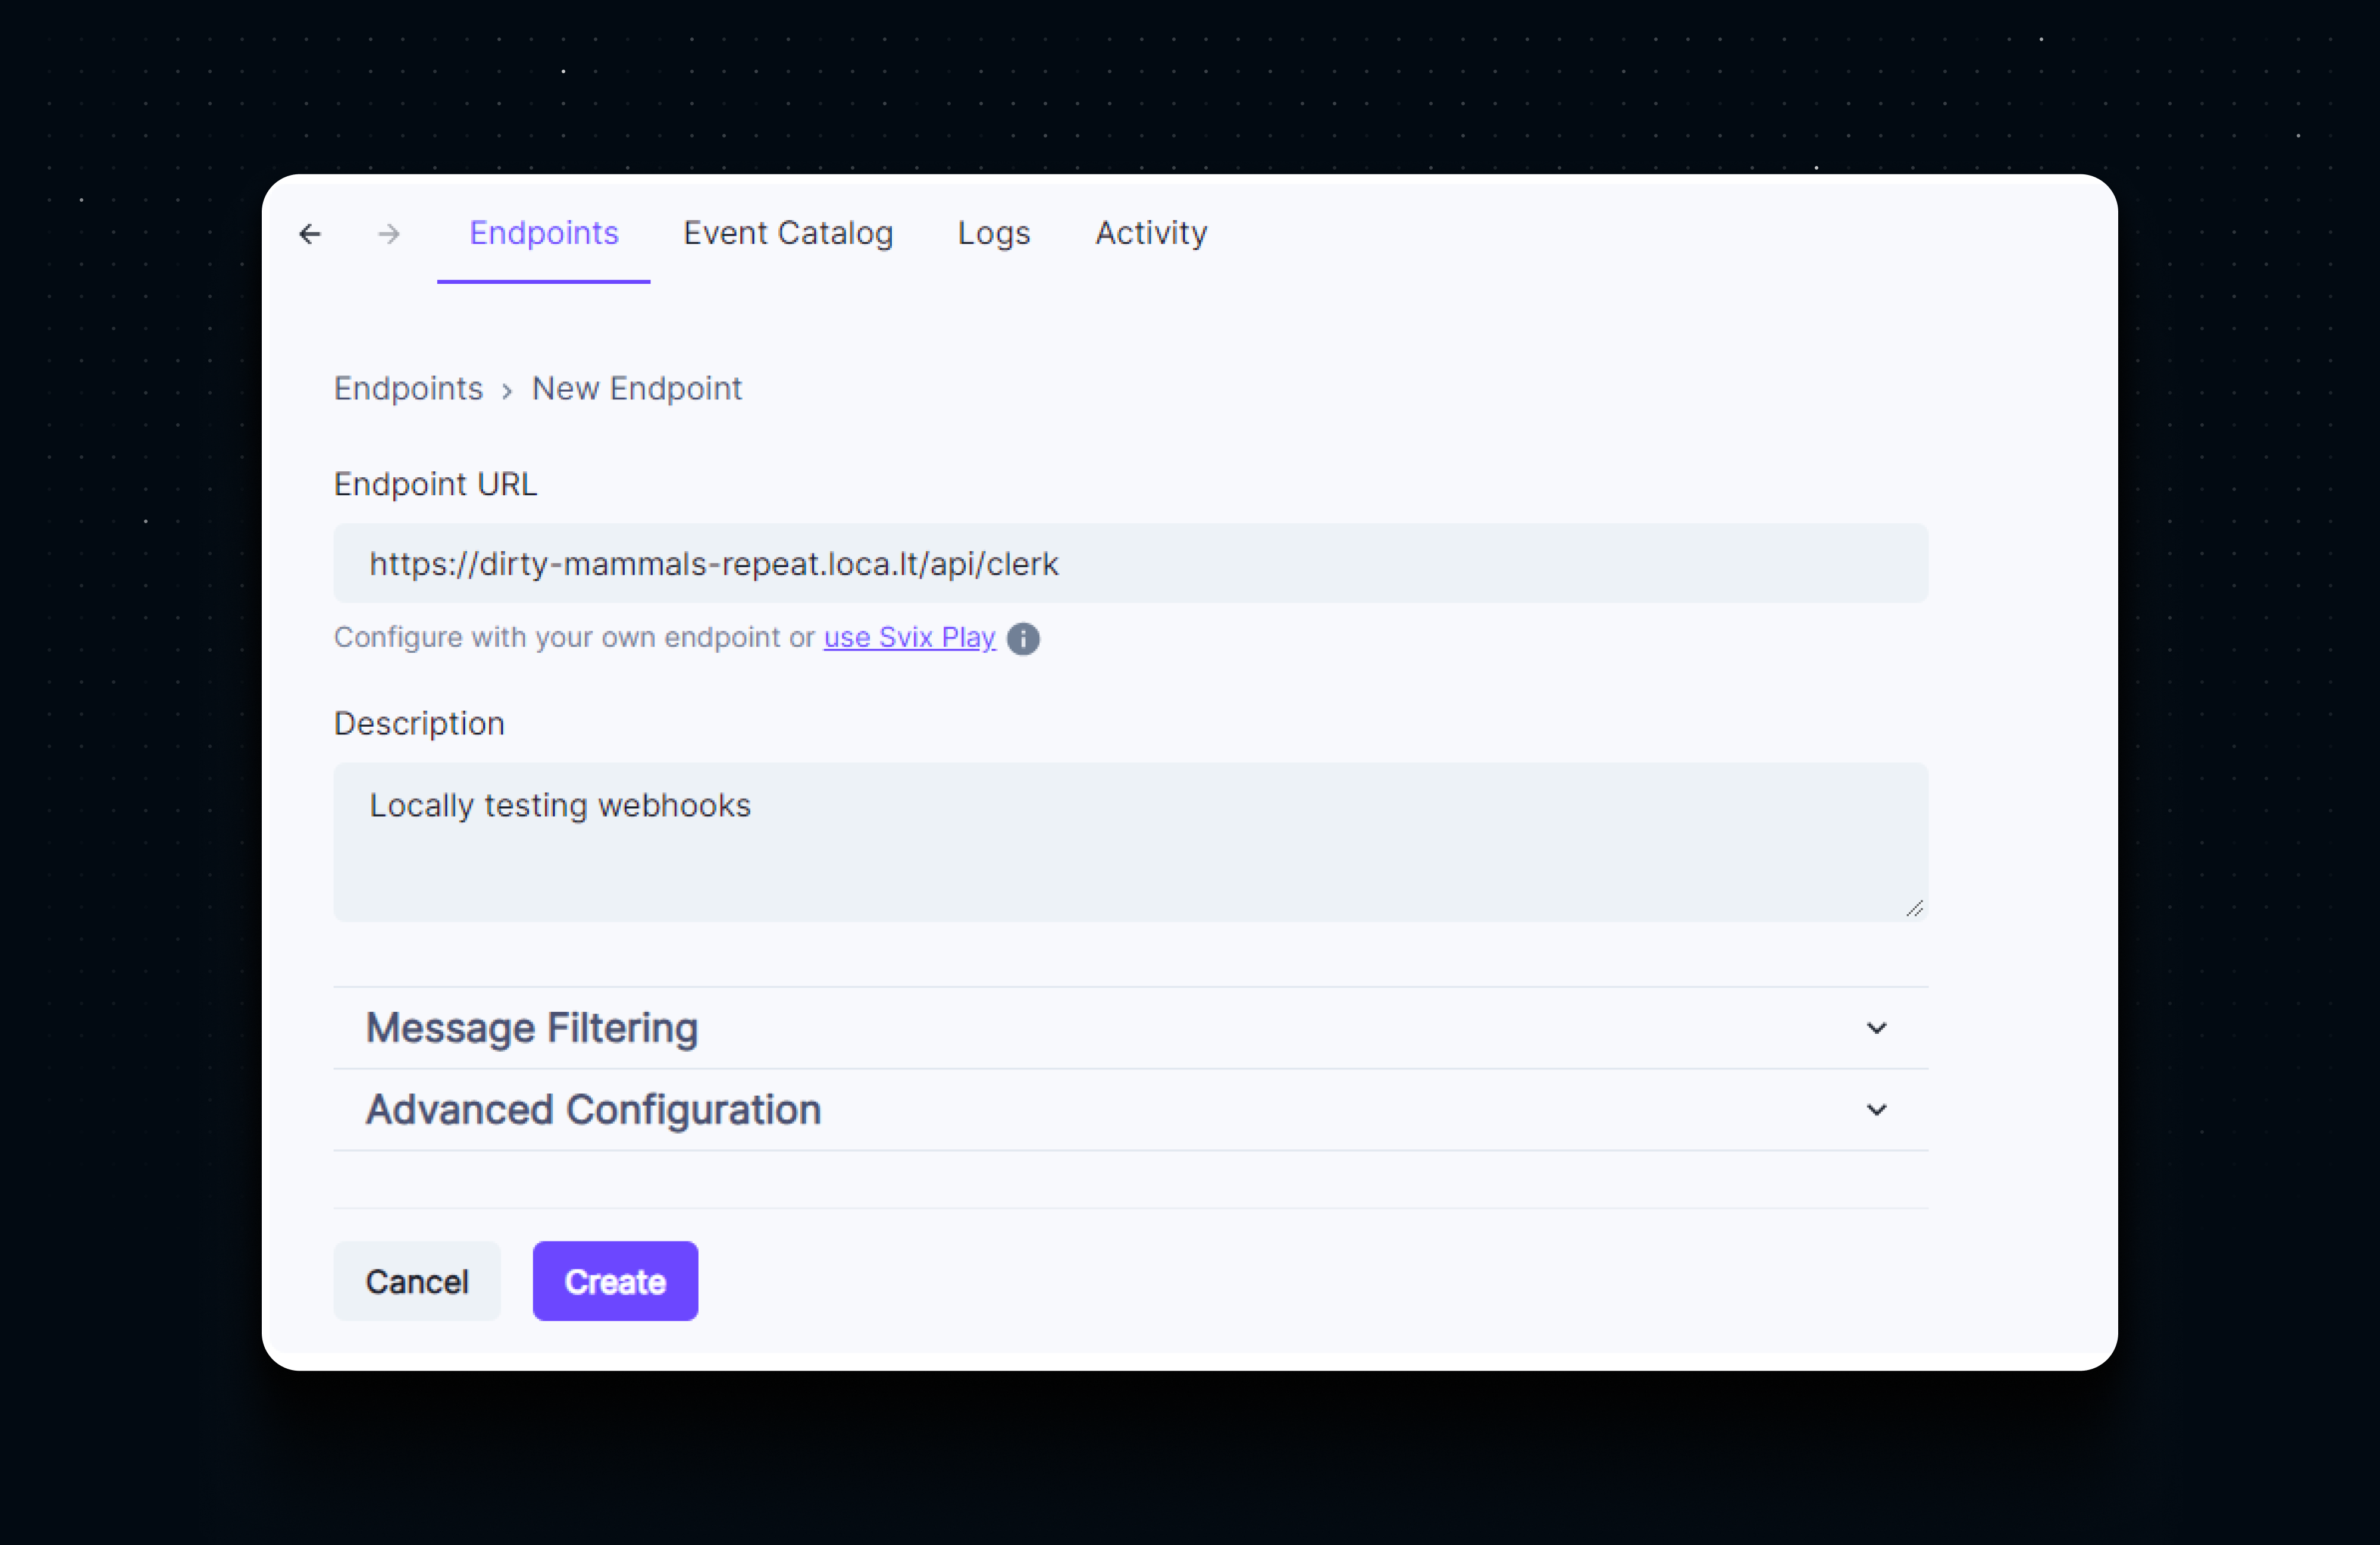
Here you can select which specific events you want to receive at this endpoint. Let’s leave these unselected for now so that we can receive webhooks for all events. Hit Create.
Once the webhook endpoint is created, we can navigate to the Testing tab. Here we can trigger an example event manually to test our webhook endpoint. Select any event from the dropdown, and hit Send Example.
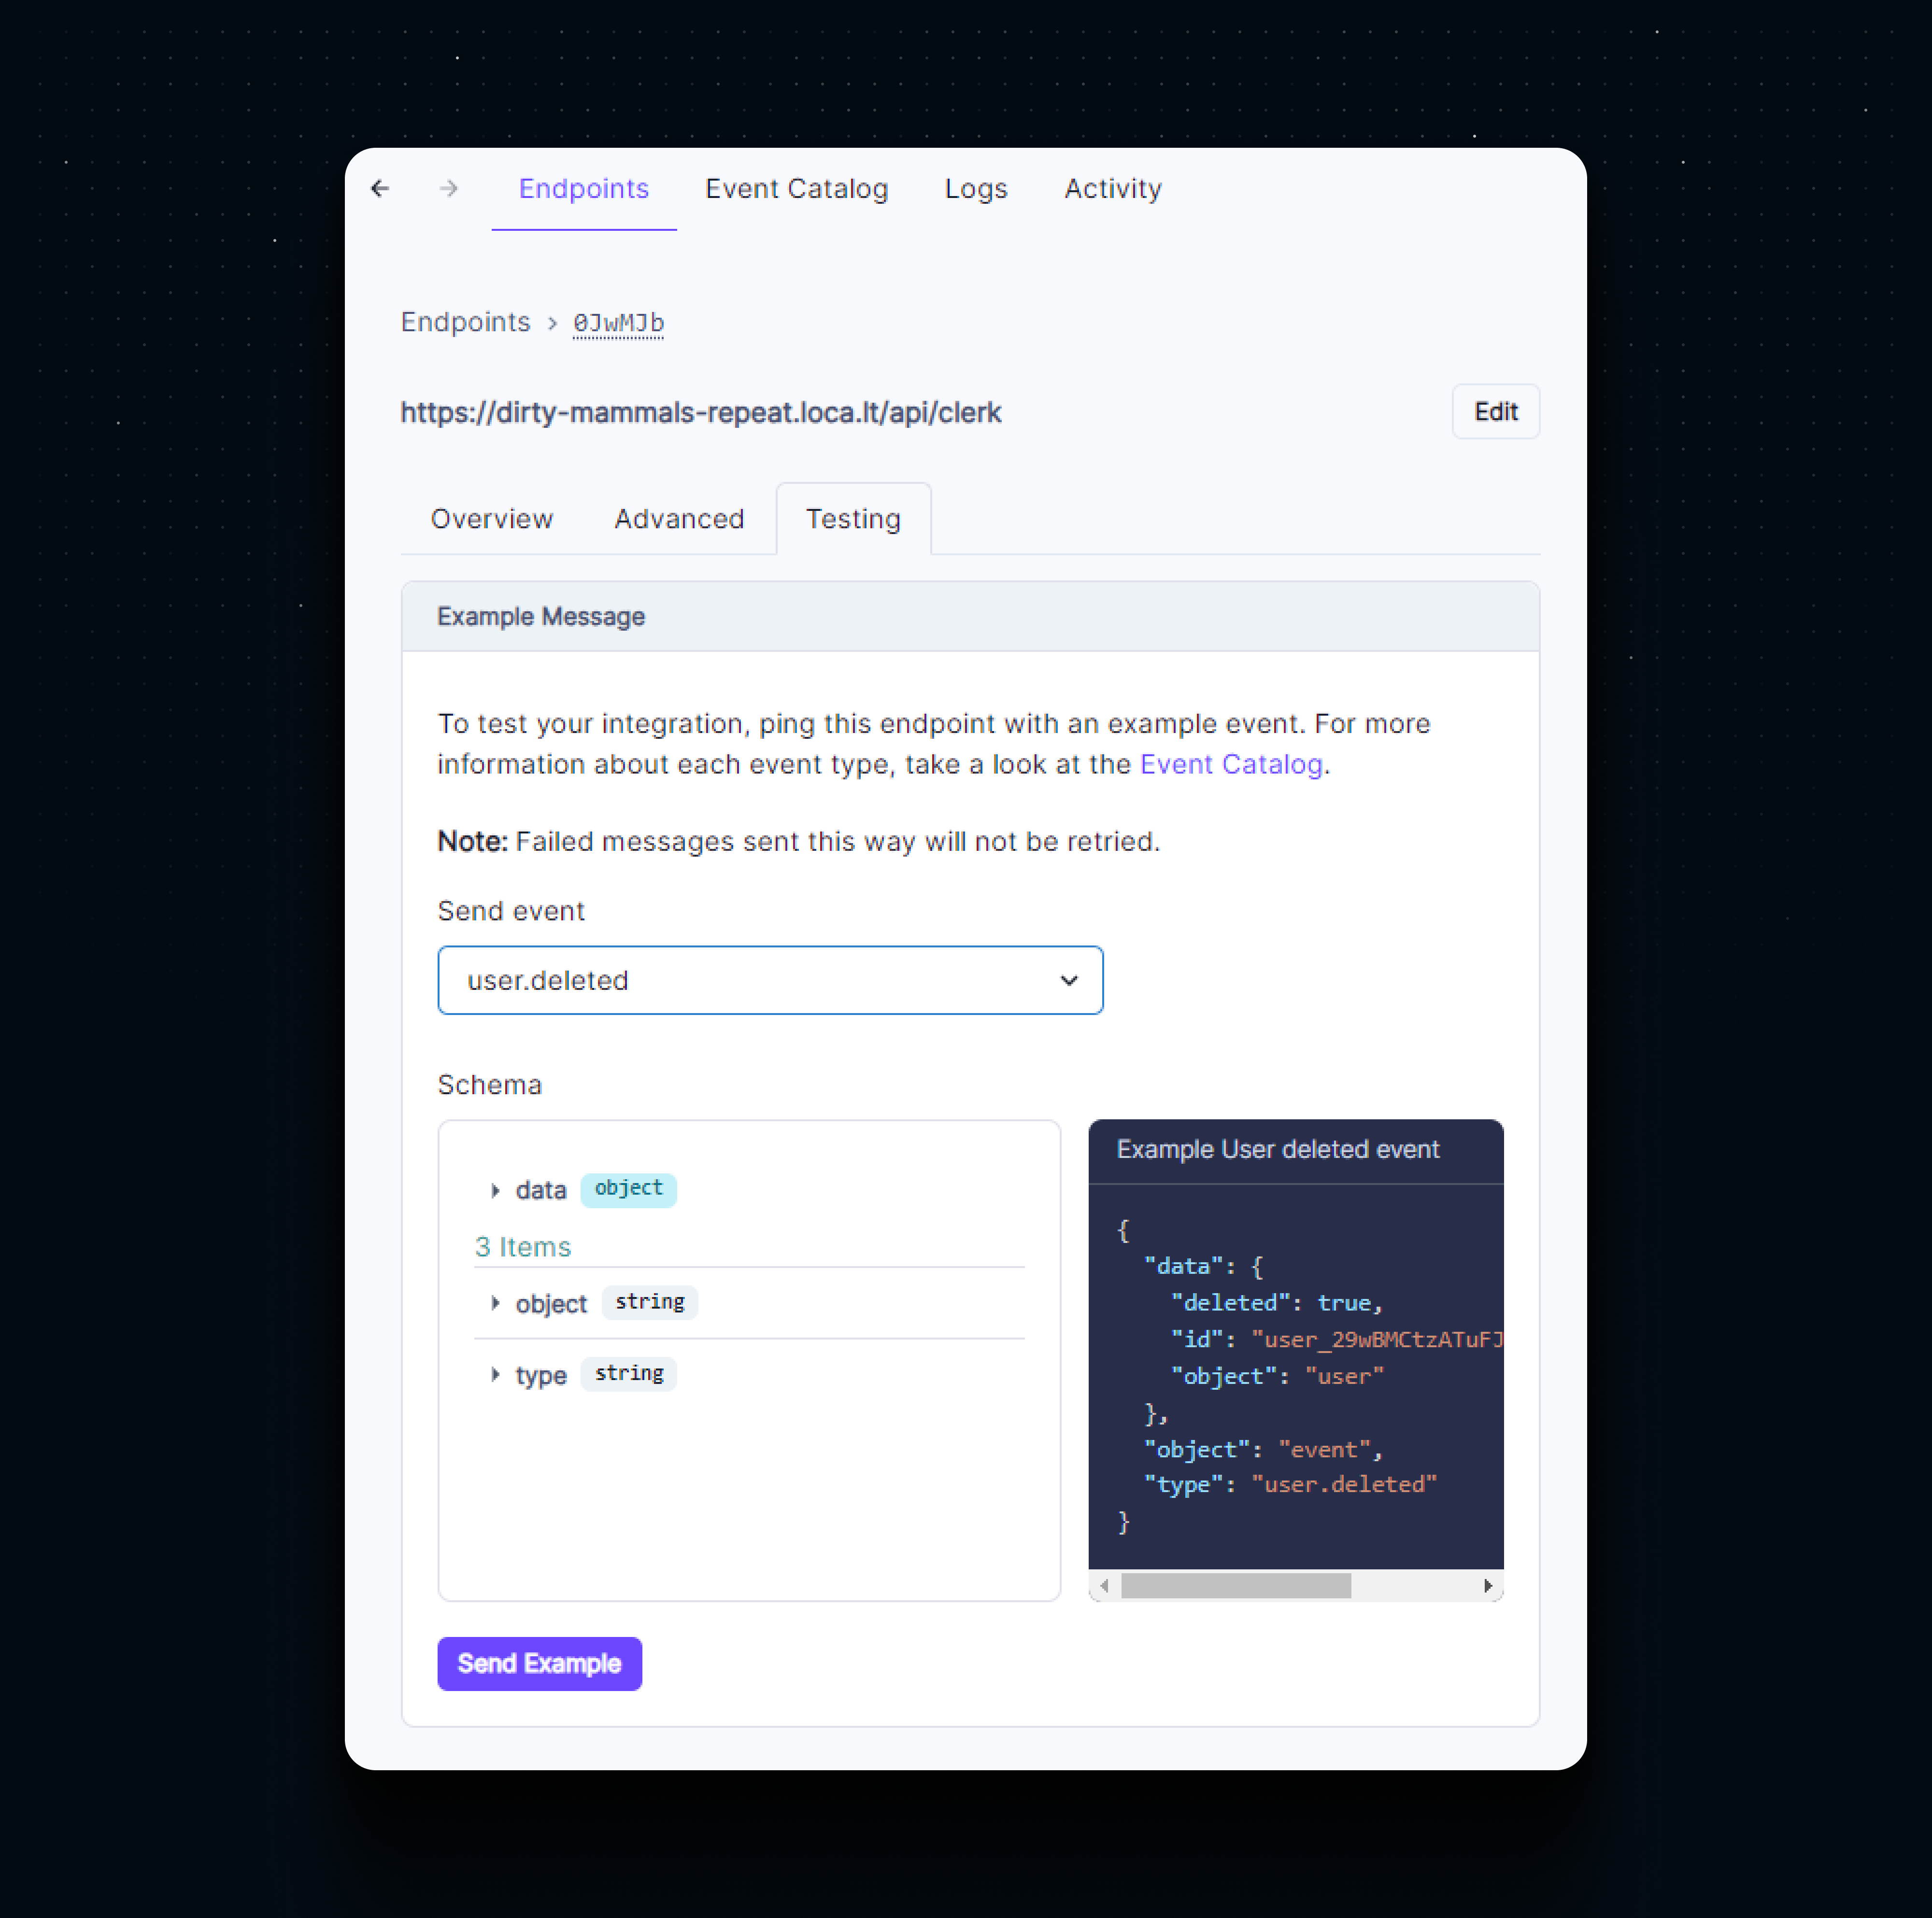
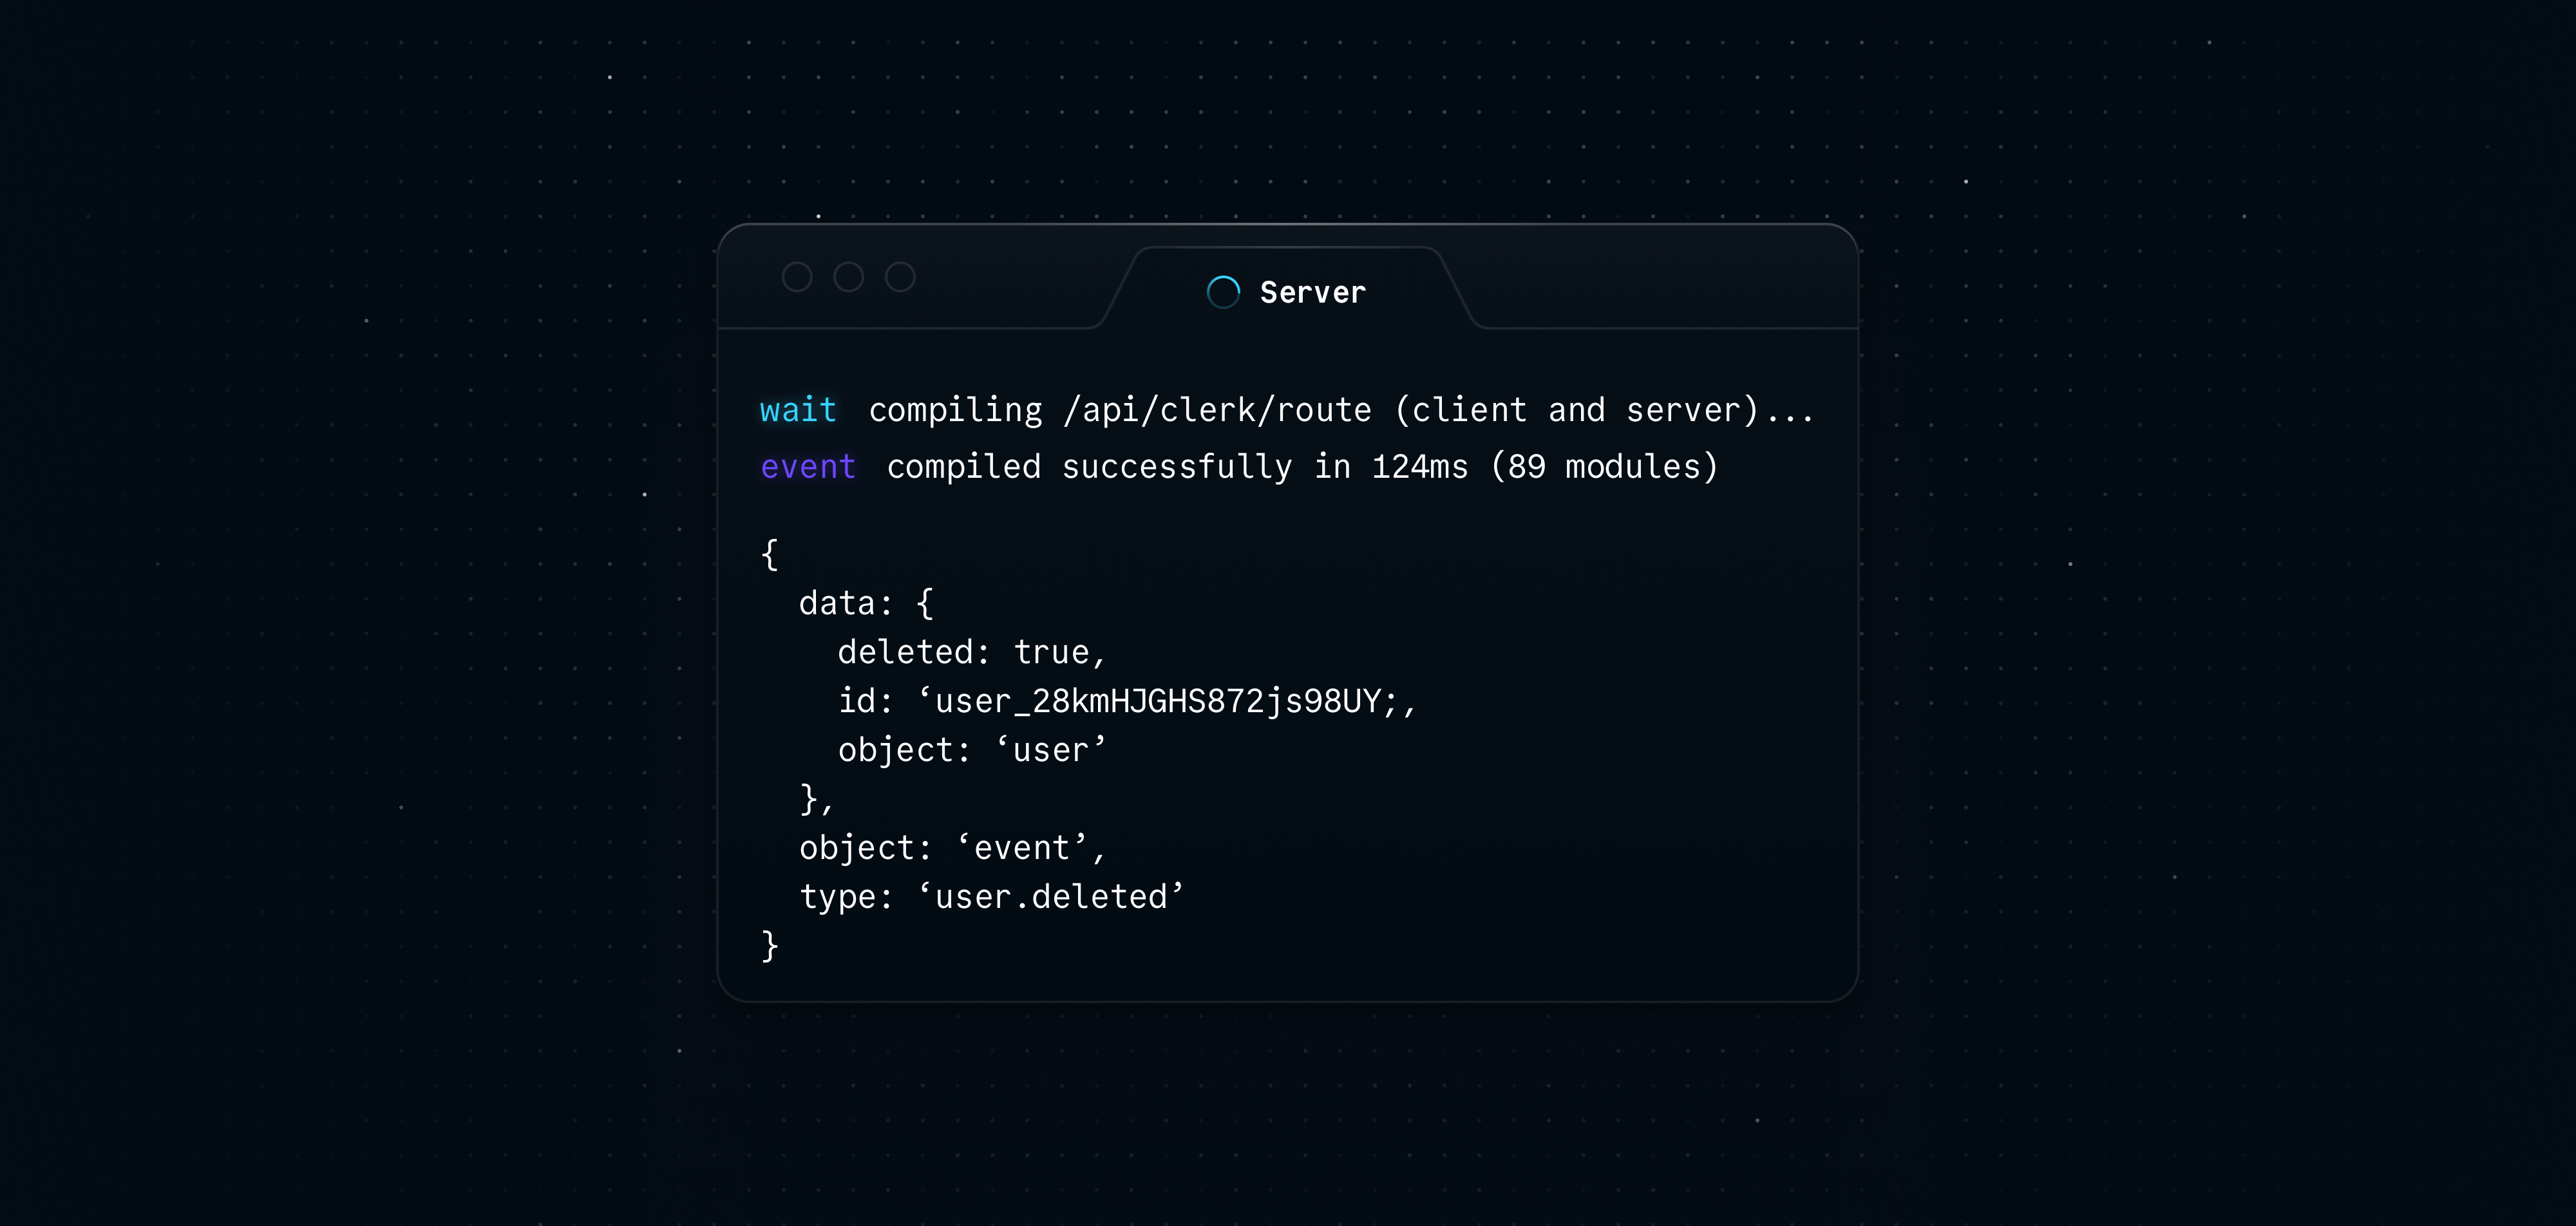
If your application is running locally and tunneling is set up correctly, you should see a message in your console with the example event.
You will also see a log entry in the Testing tab that shows the status of the webhook.
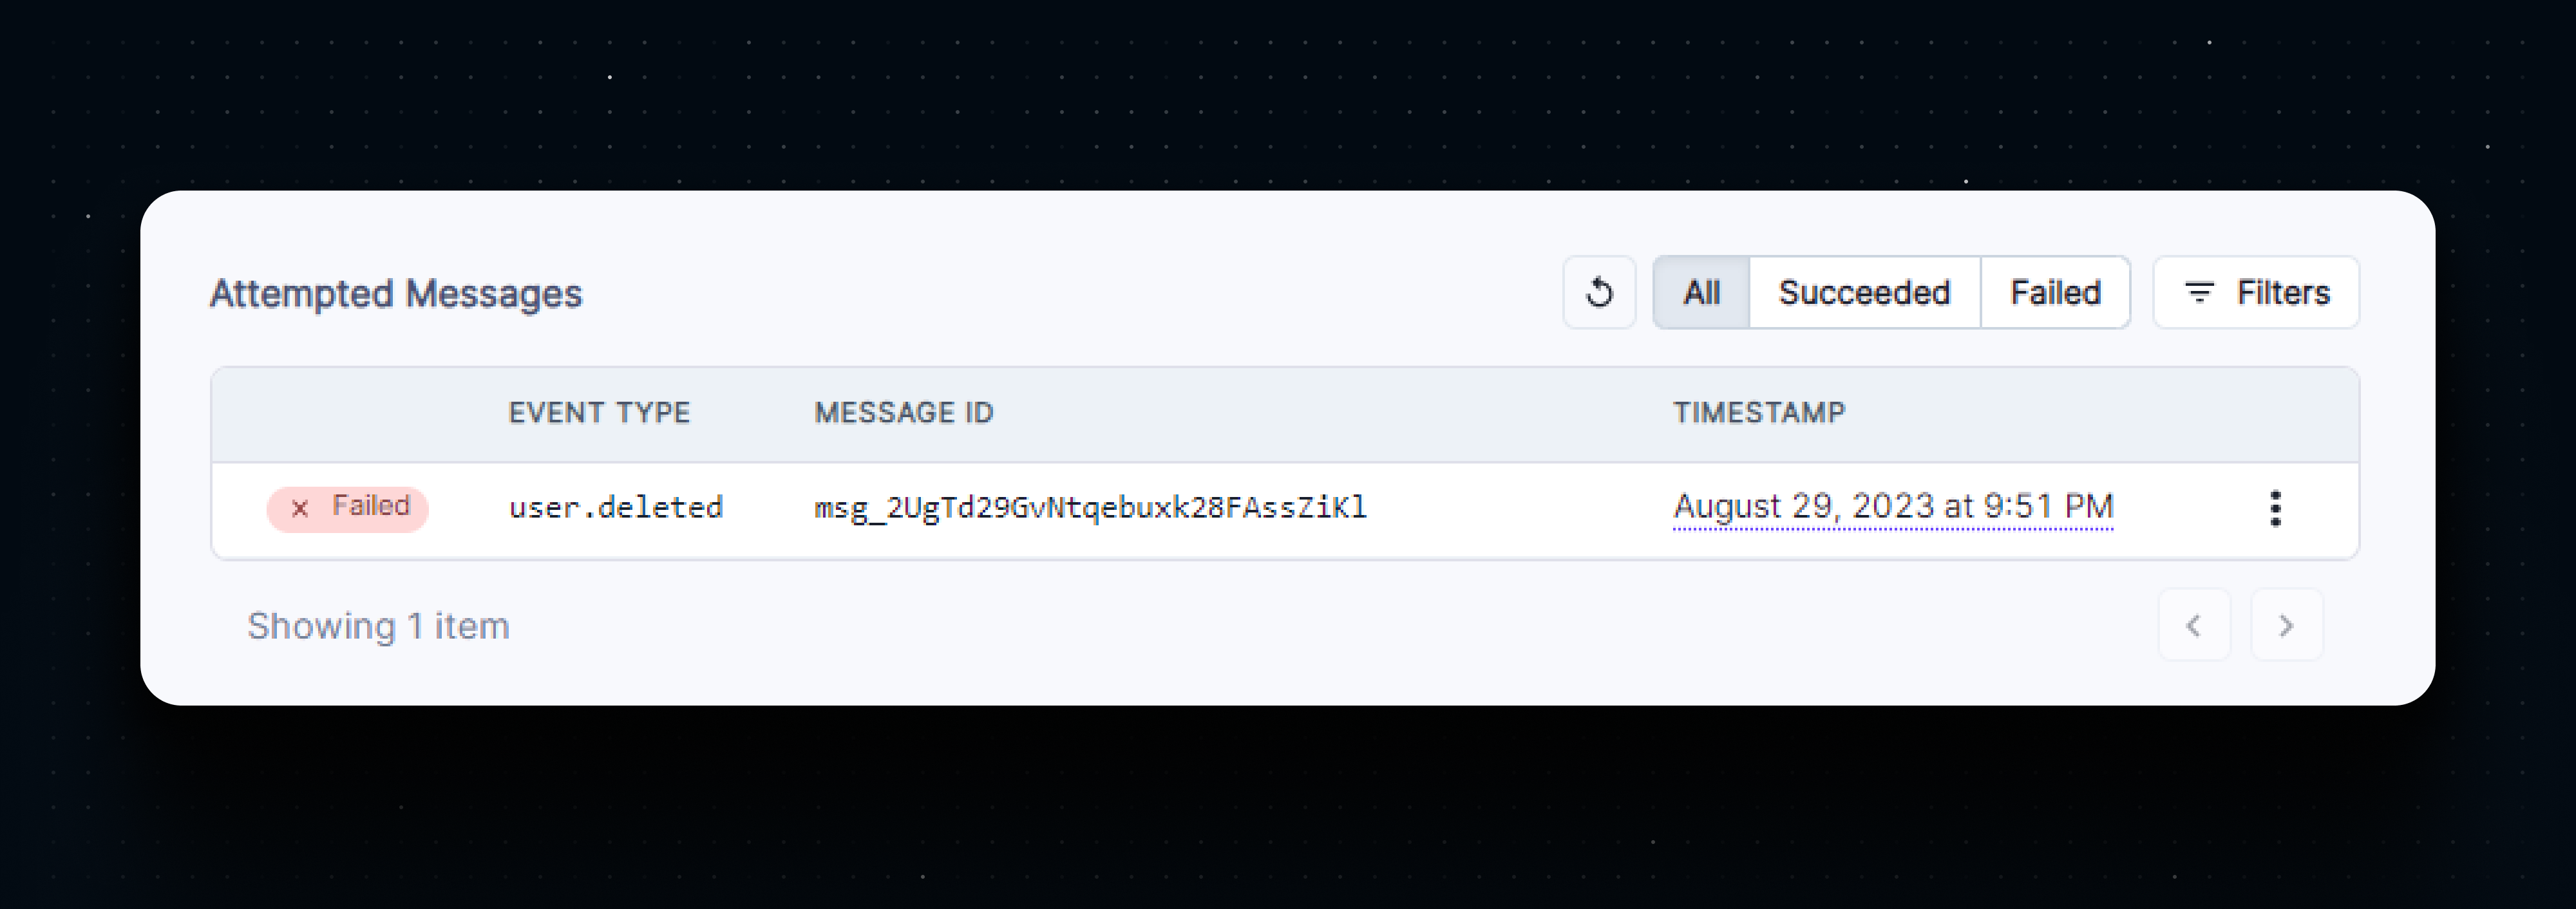
Even though the webhook was correctly received and logged to the console, the dashboard marks the webhook delivery as failed. To ensure that the delivery is marked as succeeded, we need to return a success response from our endpoint.
app/api/clerk/route.ts1export async function POST(request: Request) {2const payload: WebhookEvent = await request.json();3console.log(payload);4return Response.json({ message: "Received" });5}
Let’s send another example event. This time it the webhook should be marked as succeeded.
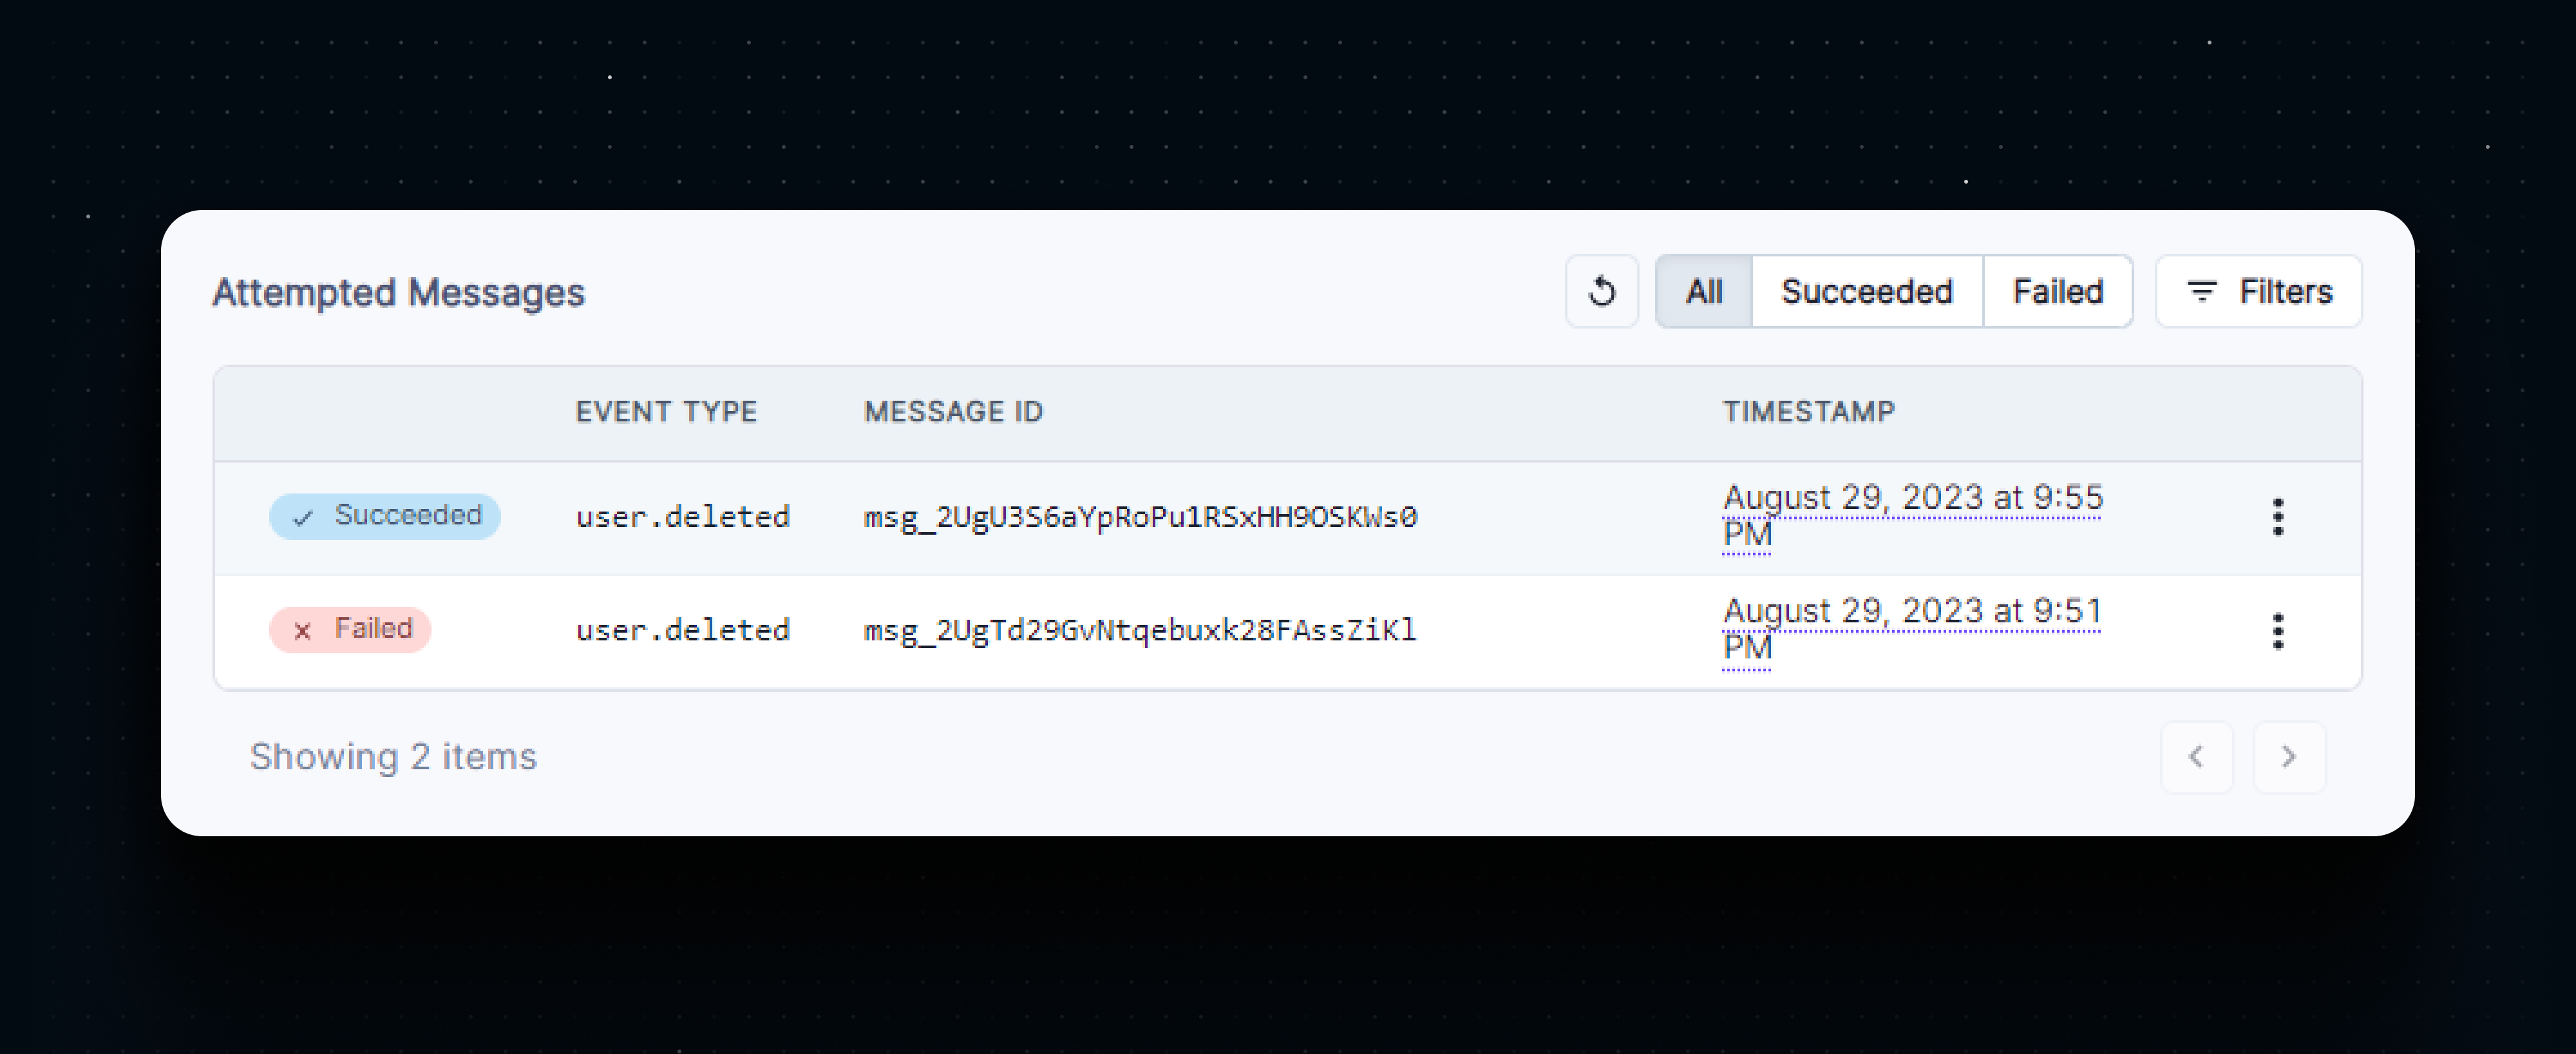
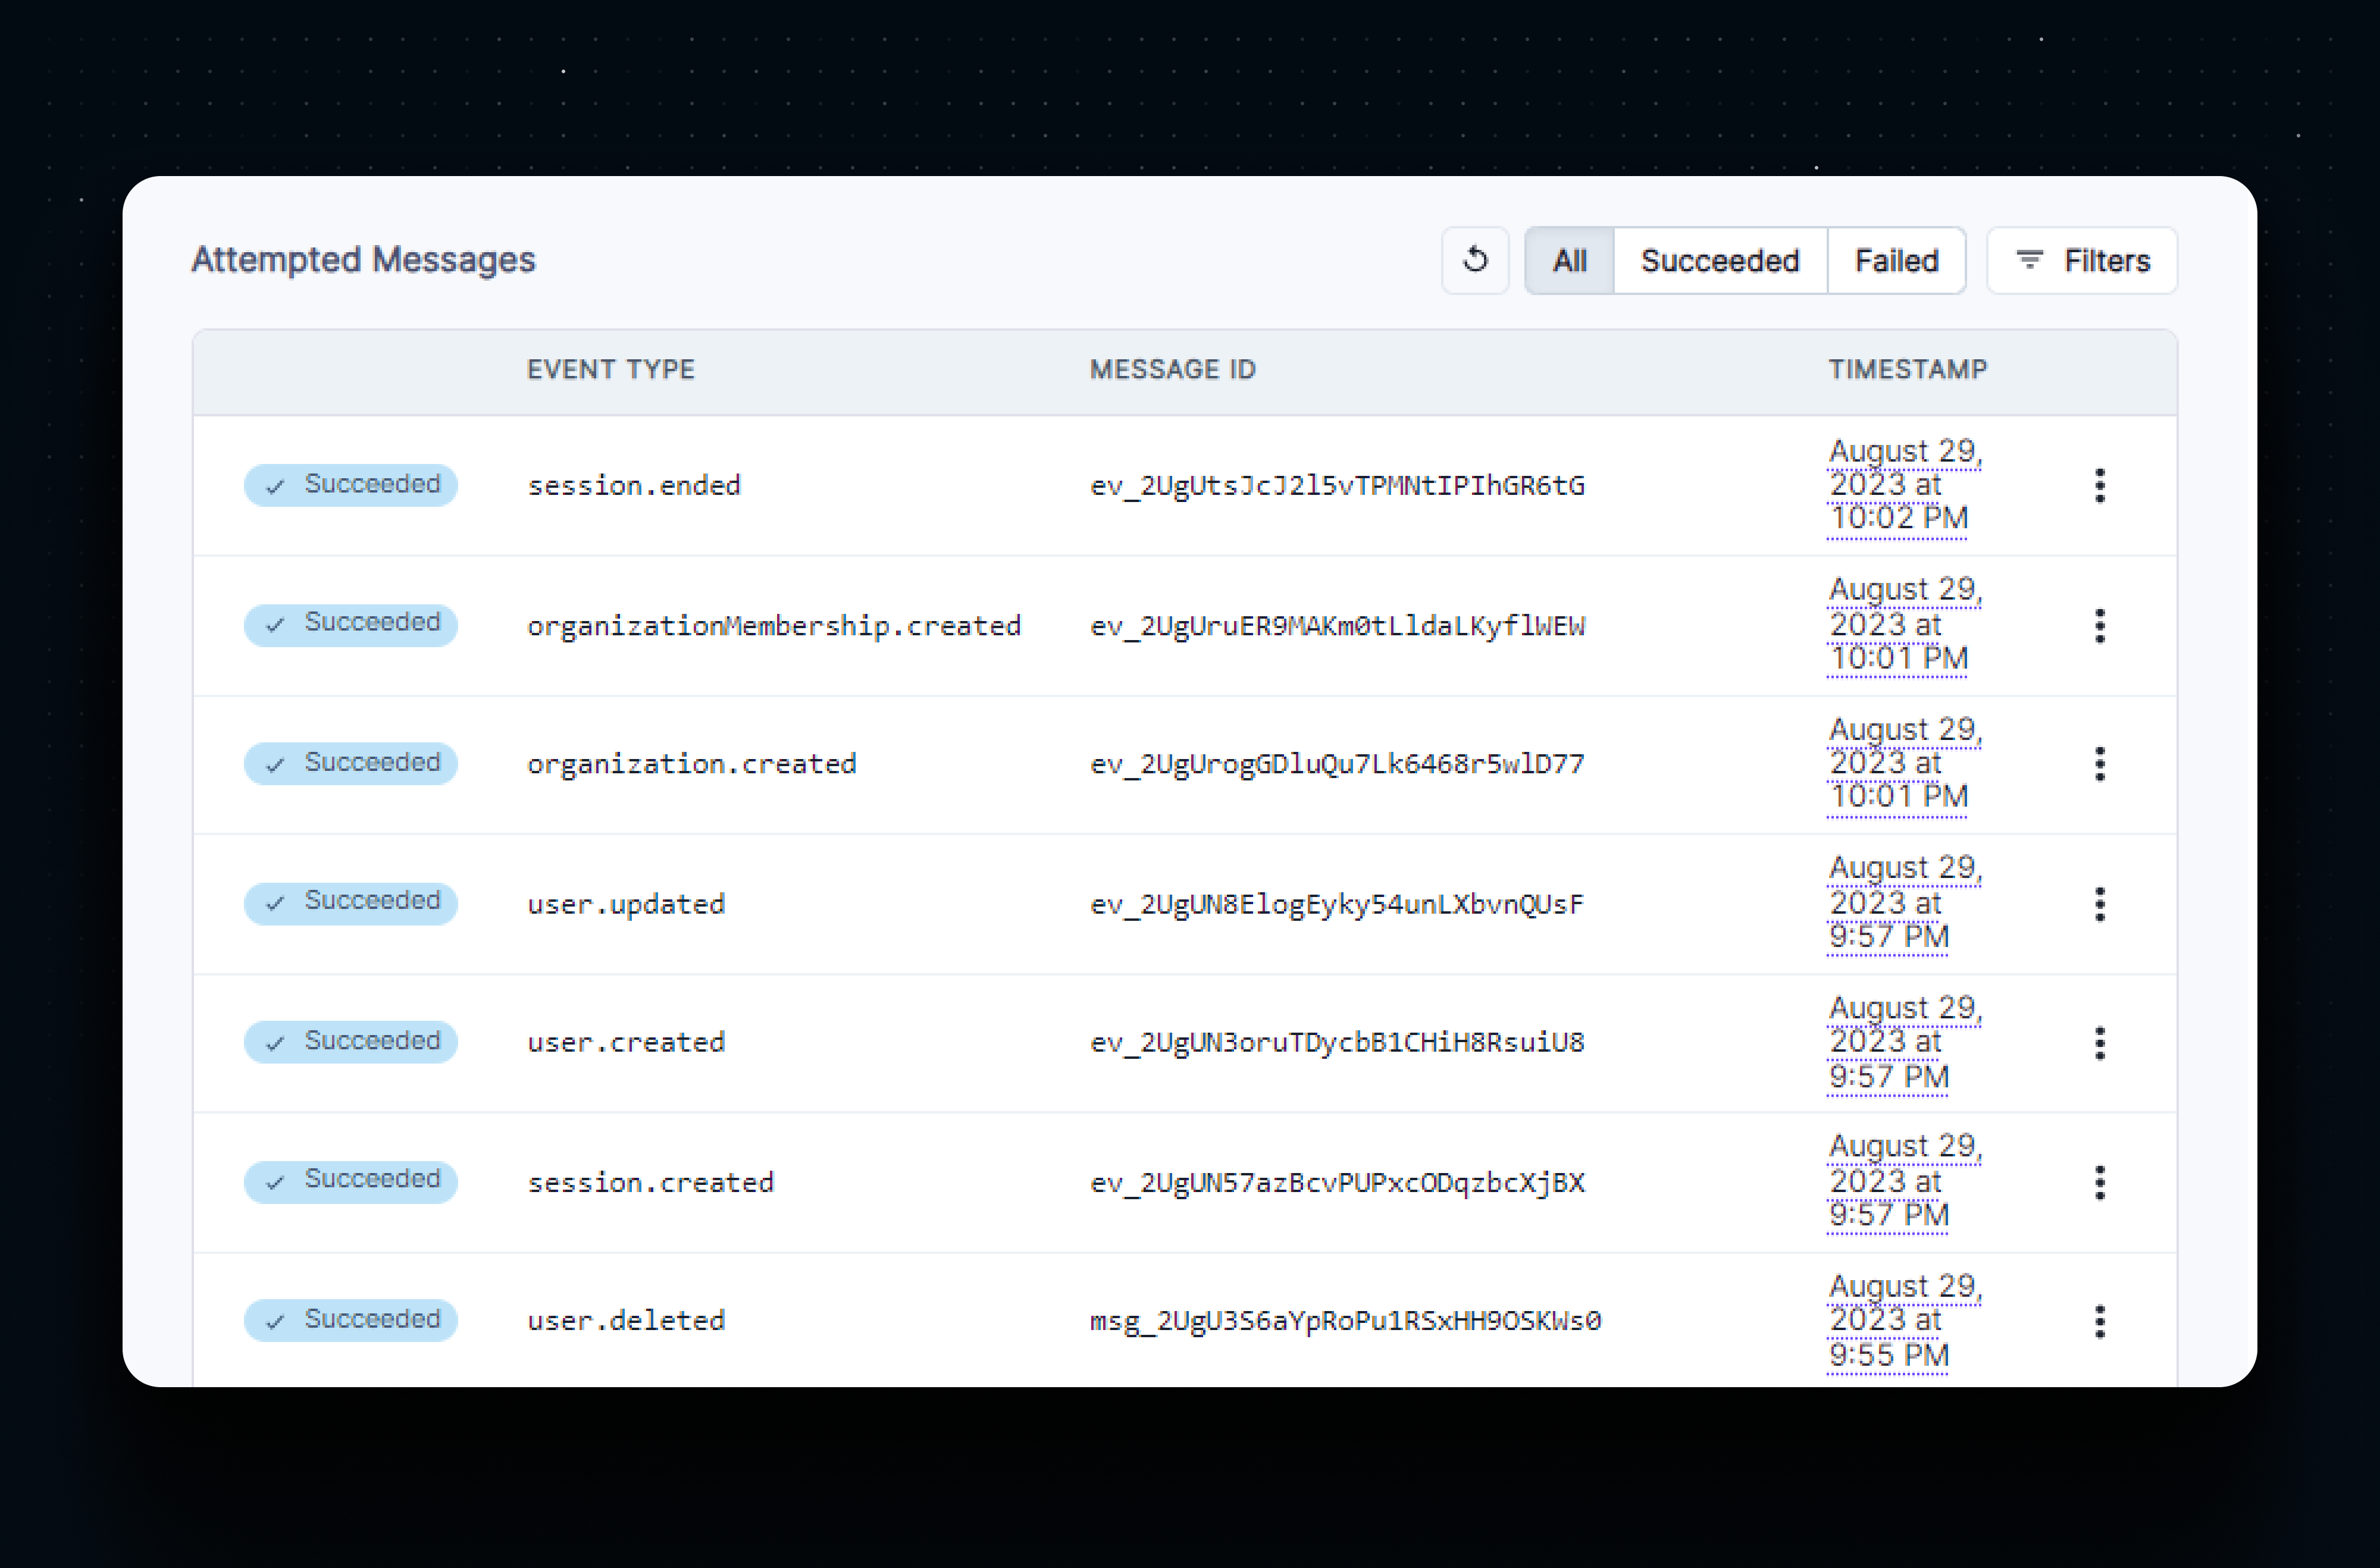
Now we can test the webhook with real events. Navigate to your application and sign up with a new account. This should log two webhook events in the console - a user.created and a session.created event.
Congratulations, we now have a functioning webhook receiver in our application! We can now further explore what events are triggered by Clerk. For example,
- Updating the user profile sends a
user.updatedevent - Signing out of the application sends a
session.endedevent - Remotely signing out a different device will result in a
session.revokedevent - Creating a new organization will trigger an
organization.createdand anorganizationMembership.createdevent
We can also see logs for real webhook events in the dashboard.
When you deploy this app to a cloud environment like Vercel, you will need to create a new endpoint in the Clerk dashboard that points to the deployed application instead of a localtunnel URL.
Note that localtunnel will generate a random URL everytime we start the tunnel, which means everytime we are testing with webhooks locally, we will need to create a new endpoint in the Clerk dashboard. To solve this, we can ask localtunnel to provision a specific URL by adding a --subdomain argument.
1lt --port 3000 --subdomain unique-url-name
If the requested URL is available, it will be provisioned for us instead of a randomly generated URL. This will allow us to reuse the same endpoint in the Clerk dashboard everytime we are testing locally.
Webhook Use Cases
So now that we are receiving webhook events from Clerk, what can we do with it?
Data Synchronization
While Clerk’s own database acts as the primary source of truth for authentication and user management, you can create a copy of this data in your own database which gets updated asynchronously through webhooks. This allows you to query your own database for user data instead of relying on Clerk’s APIs, along with flexibility with the data model, complex queries, transactional guarantees, and real time behavior. This mechanism is called data synchronization.
Event Driven Systems
Some advanced use cases might rely on asynchronous workflows and background jobs, such as sending notifications to users or other external systems. These workflows can be triggered to execute when a webhook event is received, for example, sending new users an onboarding email to your application, or subscribing them to mailing lists for software updates and promotional campaigns. Such systems are called event driven systems.
Bring Your Own Email/SMS
Clerk allows you to bring your own Email and/or SMS servers for delivering auth-related messages which would usually be delivered by Clerk. Whenever an auth-related message is created, Clerk sends a webhook event with that message to your application. You can configure Clerk to not deliver these messages in the Clerk dashboard, and instead handle the delivery yourself by listening to the webhook events. (add links to HWR and docs)
We will walk through implementing some of these use-cases in future articles.
Webhook Best Practices
While setting up a simple webhook receiver for testing purposes is straightforward, operating a webhook-driven system in production requires some additional work. Clerk implements webhook deliveries through Svix
Error Handling
Webhook deliveries are marked as successful or failed depending on the HTTP response returned by our webhook endpoint. A failed webhook delivery is retried with exponential backoff until it succeeds, ensuring that our application will never miss an event. The exponential backoff ensures that our application servers are not overloaded with retries and explode server resources.
Our webhook endpoints should be setup to return a successful response (20x) if everything went well. But in case of an error during the processing of a webhook, we can simply throw an error response (40x or 50x) and expect a retry, which often succeeds. We can also monitor the webhook status in the Clerk dashboard, which provides observability into failed webhook deliveries and help discover issues.
app/api/clerk/route.ts1import { WebhookEvent } from "@clerk/nextjs/server";23export async function POST(request: Request) {4try {5const payload: WebhookEvent = await request.json();6console.log(payload);78// process the event910// everything went well11return Response.json({ message: "Received" });12} catch (e) {13// something went wrong14// no changes were made to the database15return Response.error();16}17}
Security
Since webhooks requests can originate on any remote server, webhook endpoints are vulnerable to attacks from malicious actors. Securing webhook endpoints is important to ensure malicious actors cannot make unwanted changes to your application.
Svix adds security measures to webhook requests by adding a secure hash in the request headers created using a secret key. We can use the svix library in our webhook endpoint to validate that the request was sent by a legitimate Svix server and not a malicious actor.
app/api/clerk/route.ts1import { WebhookEvent } from "@clerk/nextjs/server";2import { headers } from 'next/headers'3import { Webhook } from "svix";45const webhookSecret = process.env.CLERK_WEBHOOK_SECRET || ``;67async function validateRequest(request: Request) {8const payloadString = await request.text();9const headerPayload = headers();1011const svixHeaders = {12"svix-id": headerPayload.get("svix-id")!,13"svix-timestamp": headerPayload.get("svix-timestamp")!,14"svix-signature": headerPayload.get("svix-signature")!,15};16const wh = new Webhook(webhookSecret);17return wh.verify(payloadString, svixHeaders) as WebhookEvent;18}1920export async function POST(request: Request) {21const payload = await validateRequest(request);22console.log(payload);23return Response.json({ message: "Received" });24}
We can get the webhook signing secret from the Clerk dashboard and store in a CLERK_WEBHOOK_SECRET environment variable.
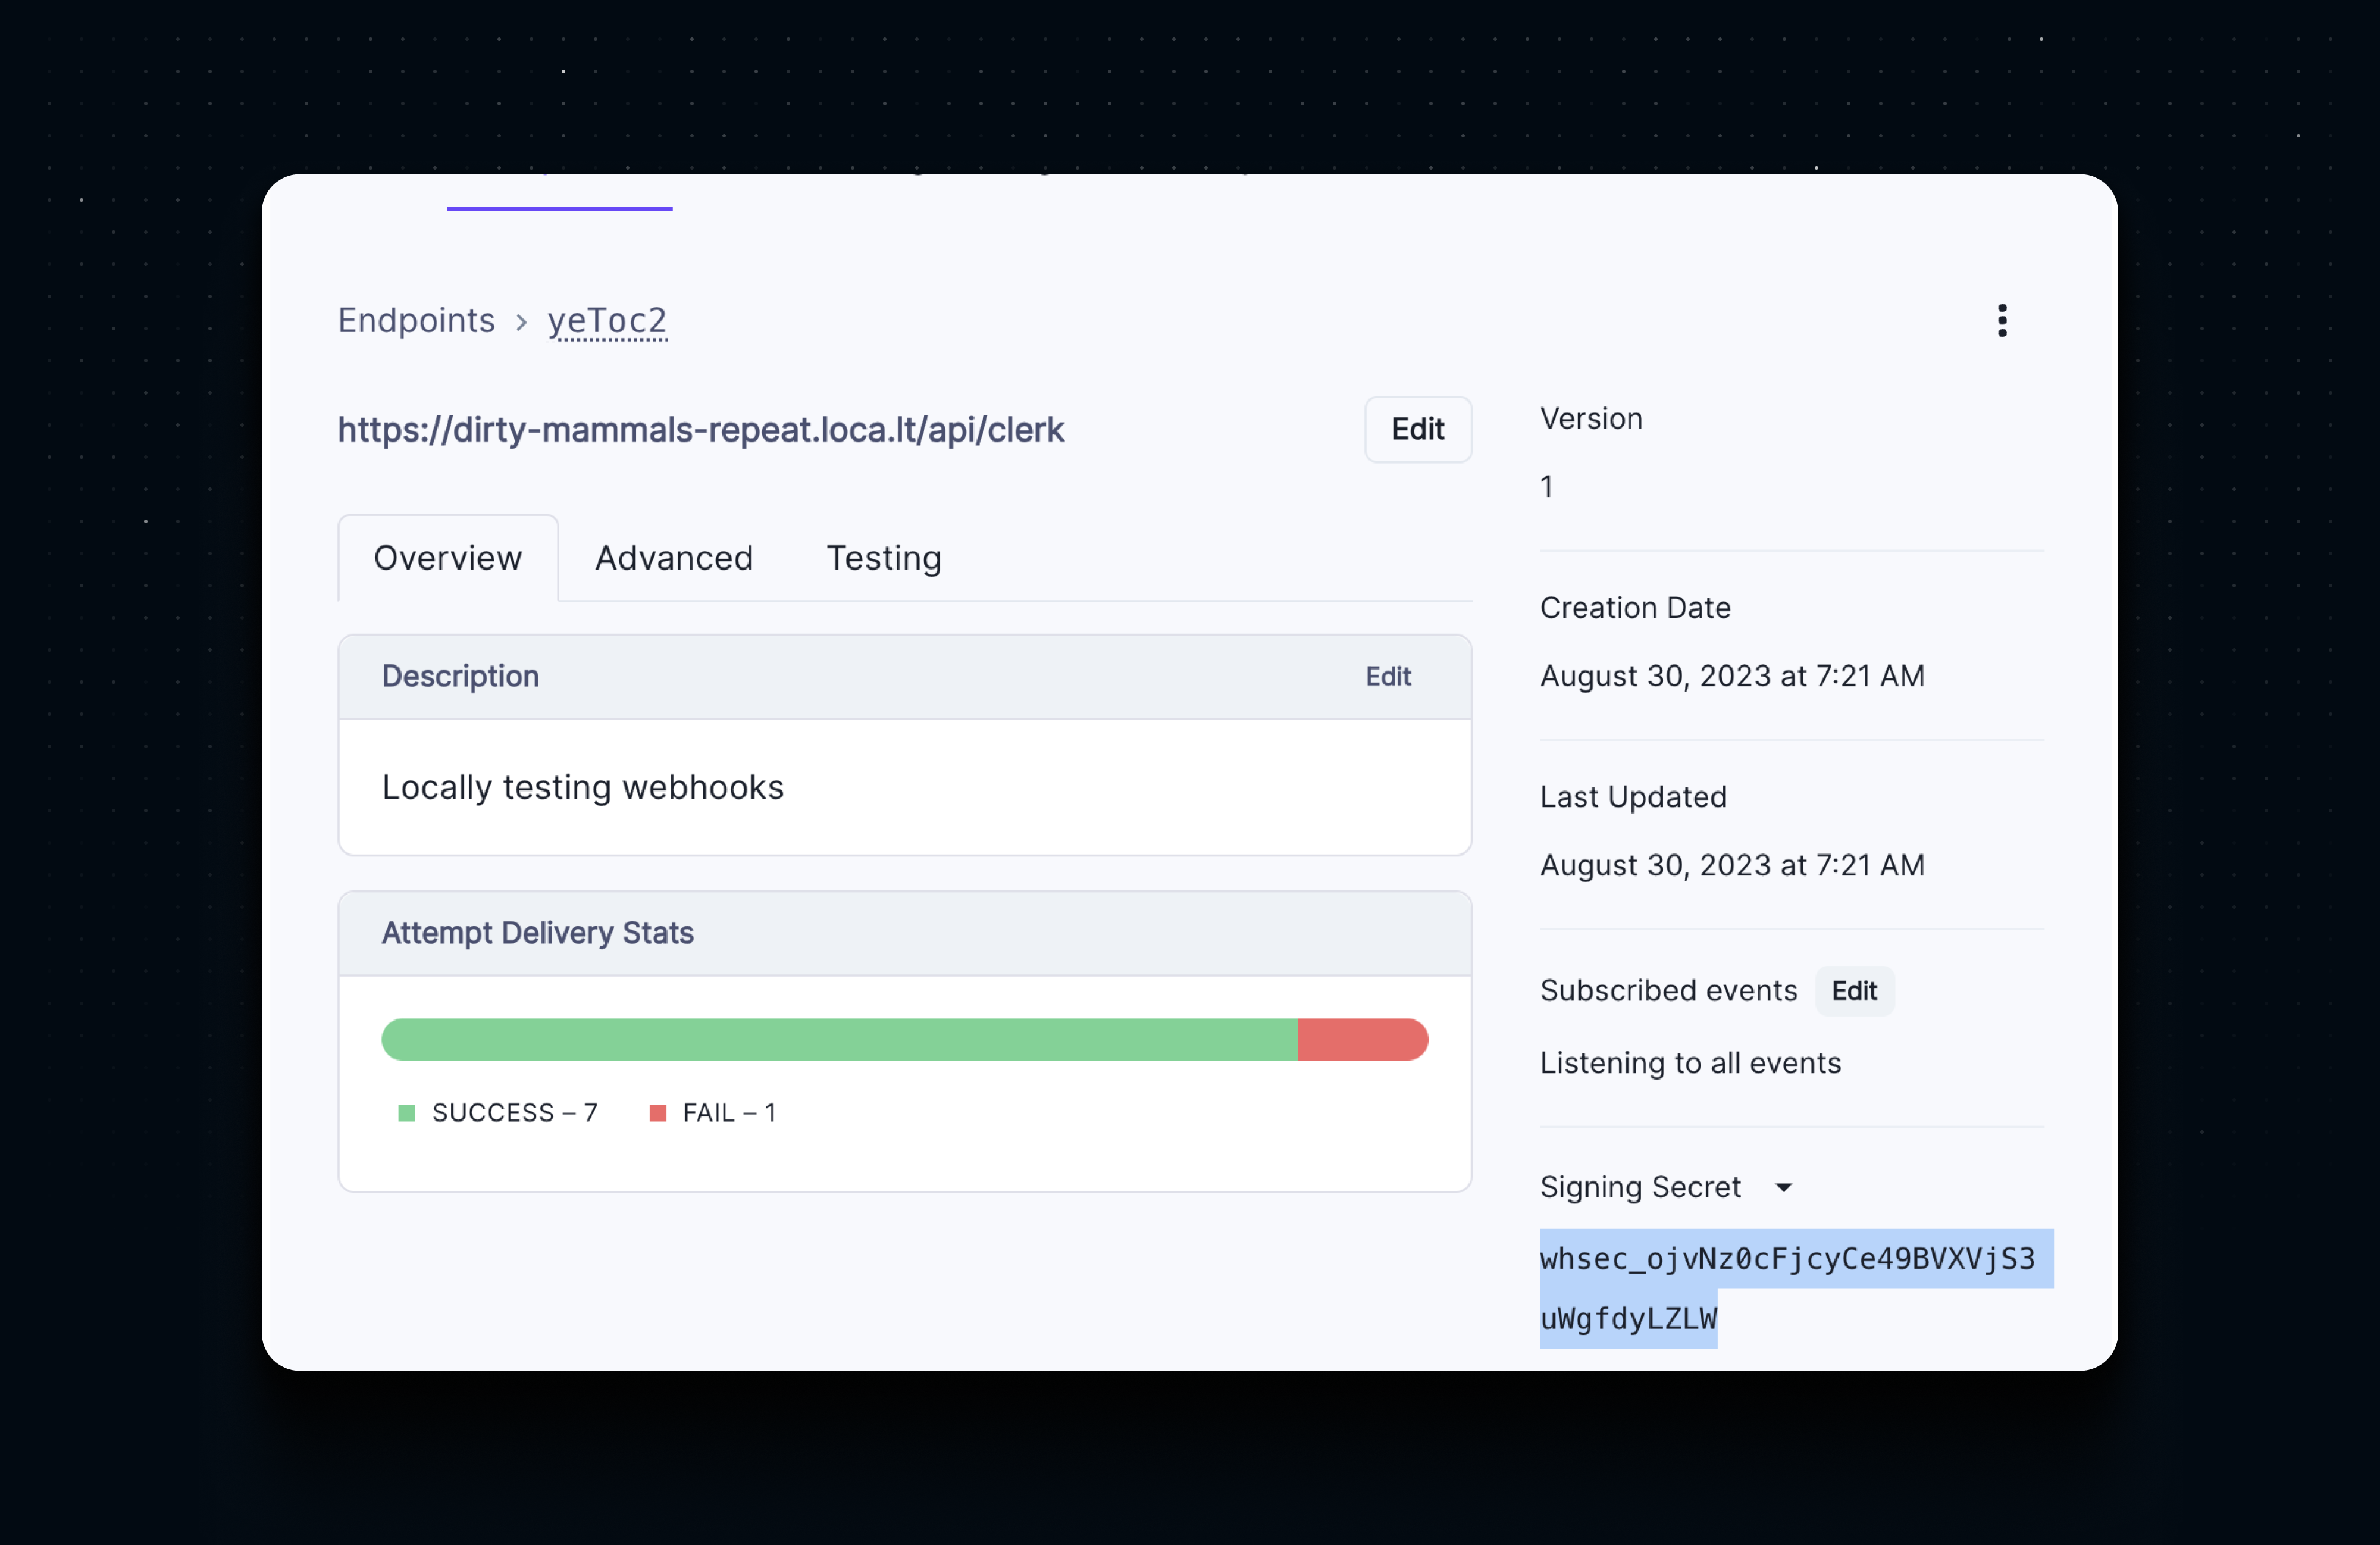
Now our webhook endpoint is fully secure and ready to be deployed to production servers.
Selective Events
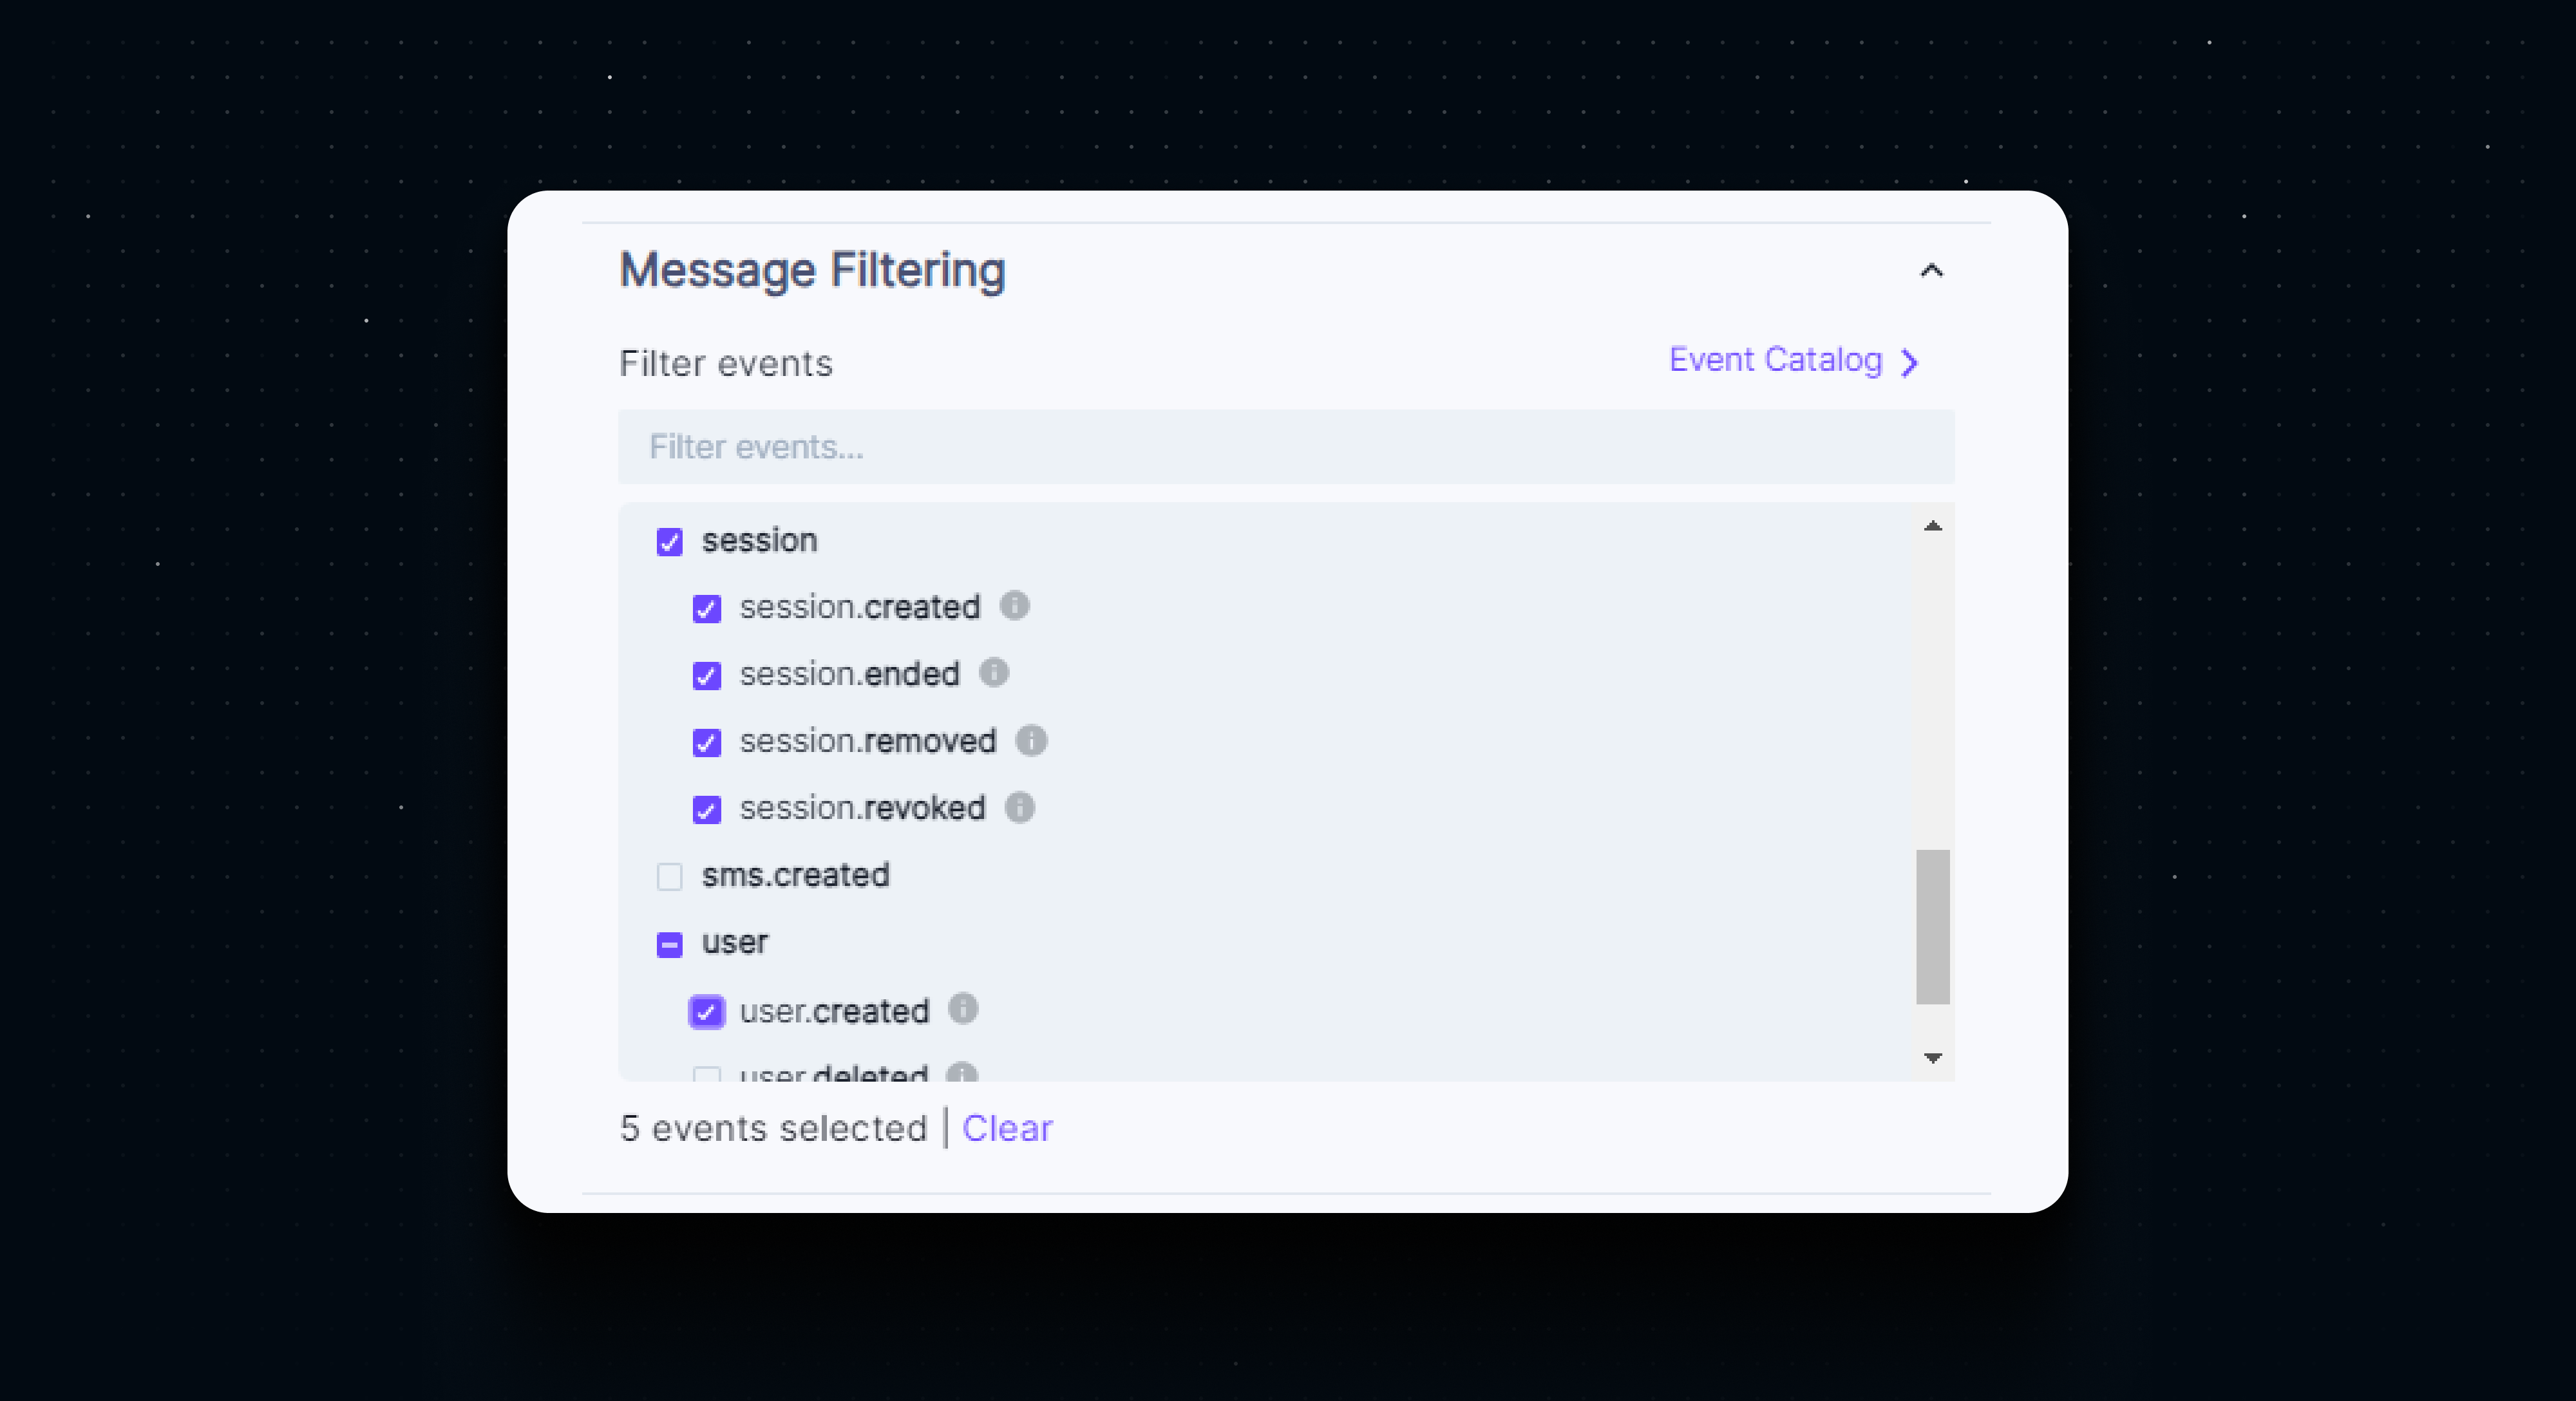
In our walkthrough, we configured Clerk to trigger the webhook endpoint for all events. While this was useful for testing, we want to minimize the use of server resources by only processing events that we actually care about.
For production endpoints, we can apply event filters in the Clerk dashboard by selecting the events that we are processing in the application, and leaving everything else unselected.
Summary
Webhooks play an important role in creating unified user experiences through integrations like data sync and event driven systems. In this article we setup a simple webhook endpoint, explored some use cases, and addressed concerns like security and error handling.
We will dive deep into specific use cases around data sync and event driven systems in future blog posts and walk through implementing them into our projects.
To learn more about webhooks, check out the ultimate webhooks guide, or to learn more about the webhook events exposed by Clerk, read the documentation.
Start now,
no strings attached
Start completely free for up to 10,000 monthly active users and up to 100 monthly active orgs. No credit card required.
Pricing built forbusinesses of all sizes.
Learn more about our transparent per-user costs to estimate how much your company could save by implementing Clerk.
Newsletter!
The latest news and updates from Clerk, sent to your inbox.